在Arch上使用Nginx/Apache安裝RainLoop Webmail

在Arch Linux上安裝RainLoop
一旦在您的伺服器部署上Rainloop,剩餘要做的唯一的事情是通過Web瀏覽器訪問您的Rainloop,並提供你正在使用的郵件伺服器信息。
本教程包含了在 Arch Linux上的Rainloop 網頁客戶端的安裝流程,包括如何進行配置 Apache 或 Nginx, 當然本教程使用修改Hosts的方式,從而避免了DNS的訪問。
If you also need references on installing Rainloop on Debian and Red Hat systems visit the previous RainLoop Webmail article at.
如果你還是需要一篇在Debian 和 Red Hat 安裝 RainLoop Webmail 的教程,你可以看這篇文章:
以及在 Ubuntu 伺服器中安裝 RainLoop Webmail 的教程,你可以看這篇文章:
系統要求
對 Nginx
對 Apache
Step 1:在 Nginx 或者 Apache 上創建虛擬主機
1. 假設你已經如上面介紹的鏈接所述,配置好了您的伺服器(Nginx或Apache),你需要做的第一件事是在Hosts文件里創建一個原始解析記錄,以指向的Arch Linux系統的IP。
對於Linux系統,修改 /etc/hosts 文件並且在你的localhost條目之下添加 Rainloop 的虛擬域。如下:
127.0.0.1   localhost.localdomain  localhost     rainloop.lan
192.168.1.33    rainloop.lan
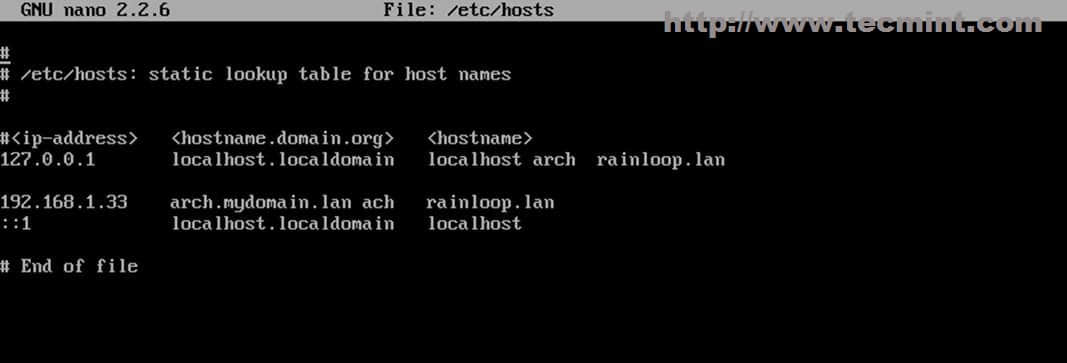
添加域信息
如果是Windows系統,則修改 C:WindowsSystem32driversetchosts 並且將接下來的內容添加到你的文件里:
192.168.1.33 rainloop.lan
2. 使用 ping 命令確認本地的 Rainloop 域名創建成功之後,然後在 Apache 或 Nginx 中創建所需的 虛擬主機 和 SSL 配置。
Nginx 虛擬主機
在/etc/nginx/sites-available/ 目錄下使用如下命令創建一個名叫rainloop.lan的文件:
$ sudo nano /etc/nginx/sites-available/rainloop.conf
添加如下的文件內容:
server {
    listen 80;
    server_name rainloop.lan;

    rewrite        ^ https://$server_name$request_uri? permanent;
    access_log /var/log/nginx/rainloop.lan.access.log;
    error_log /var/log/nginx/rainloop.lan.error.log;
    root /srv/www/rainloop/;

    # serve static files
    location ~ ^/(images|javascript|js|css|flash|media|static)/  {
        root    /srv/www/rainloop/;
        expires 30d;
    }

    location / {
        index index.html index.htm index.php;
        autoindex on;
        autoindex_exact_size off;
        autoindex_localtime on;
    }

    location ^~ /data {
        deny all;
    }

    location ~ .php$ {
        #fastcgi_pass 127.0.0.1:9000; (depending on your php-fpm socket configuration)
        fastcgi_pass unix:/run/php-fpm/php-fpm.sock;
        fastcgi_index index.php;
        include fastcgi.conf;
    }
 }
接下來創建SSL配置文件:
$ sudo nano /etc/nginx/sites-available/rainloop-ssl.conf
添加如下內容:
server {
    listen 443 ssl;
    server_name rainloop.lan;

    ssl_certificate     /etc/nginx/ssl/rainloop.lan.crt;
    ssl_certificate_key  /etc/nginx/ssl/rainloop.lan.key;
    ssl_session_cache    shared:SSL:1m;
    ssl_session_timeout  5m;
    ssl_ciphers  HIGH:!aNULL:!MD5;
    ssl_prefer_server_ciphers  on;

    access_log /var/log/nginx/rainloop.lan.access.log;
    error_log /var/log/nginx/rainloop.lan.error.log;

    root /srv/www/rainloop/;

    # serve static files
    location ~ ^/(images|javascript|js|css|flash|media|static)/  {
        root    /srv/www/rainloop/;
        expires 30d;
    }

    location ^~ /data {
        deny all;
    }

    location / {
        index index.html index.htm index.php;
        autoindex on;
        autoindex_exact_size off;
        autoindex_localtime on;
    }

    location ~ .php$ {
        #fastcgi_pass 127.0.0.1:9000; (depending on your php-fpm socket configuration)
        fastcgi_pass unix:/run/php-fpm/php-fpm.sock;
        fastcgi_index index.php;
        include fastcgi.conf;
    }
 }
接下來將會自動生成Certificate和Keys文件,然後在文件中叫*Common Name的證書里中添加您的虛擬域名( rainloop.lan)。
$ sudo nginx_gen_ssl.sh
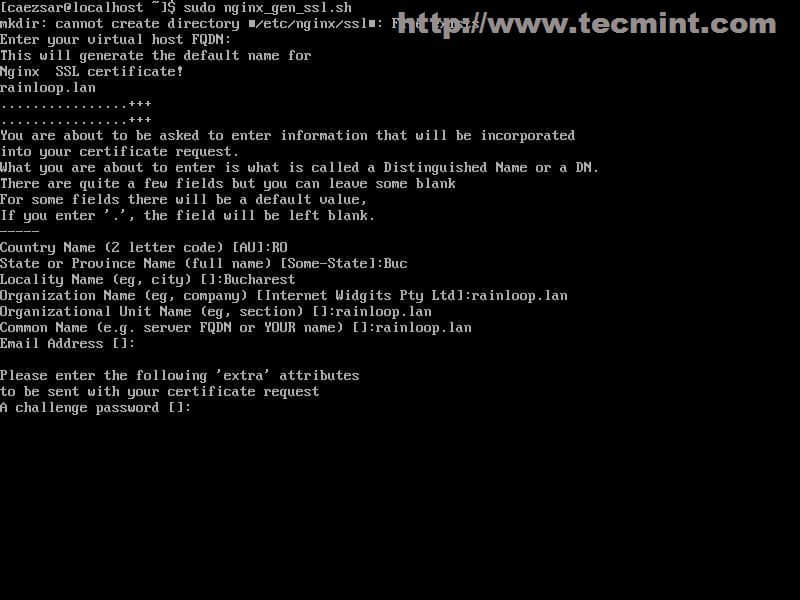
生成證書和密鑰
生成證書和SSL密鑰後,創建Rainloop Web伺服器根的文件路徑(Rainloop PHP文件所在的位置),然後啟用虛擬主機,並重新啟動Nginx的守護進程,應用配置。
$ sudo mkdir -p /srv/www/rainloop
$ sudo n2ensite rainloop
$ sudo n2ensite rainloop-ssl
$ sudo systemctl restart nginx

創建RainLoop 網頁嚮導
Apache 虛擬主機
在/etc/httpd/conf/sites-available/中創建 rainloop.conf文件:
$ sudo nano /etc/httpd/conf/sites-available/rainloop.conf
添加如下內容:
<VirtualHost *:80>
    ServerName rainloop.lan
    DocumentRoot "/srv/www/rainloop/"
    ServerAdmin you@example.com
    ErrorLog "/var/log/httpd/rainloop-error_log"
    TransferLog "/var/log/httpd/rainloop-access_log"
    <Directory />
        Options +Indexes +FollowSymLinks +ExecCGI
        AllowOverride All
        Order deny,allow
        Allow from all
        Require all granted
    </Directory>
</VirtualHost>
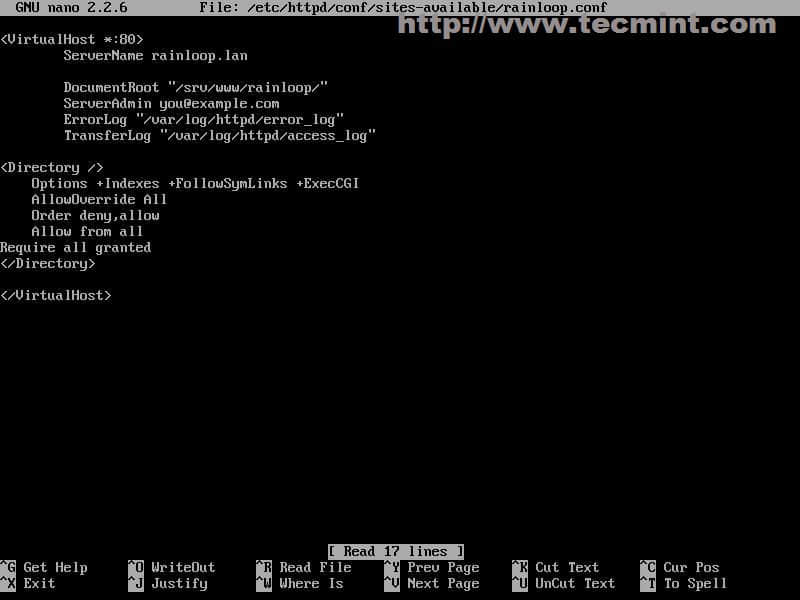
創建Apache虛擬主機
為Apache添加SSL支持:
$ sudo nano /etc/httpd/conf/sites-available/rainloop-ssl.conf
添加如下文件內容:
<VirtualHost *:443>
    ServerName rainloop.lan
    DocumentRoot "/srv/www/rainloop/"
    ServerAdmin you@example.com
    ErrorLog "/var/log/httpd/rainloop-ssl-error_log"
    TransferLog "/var/log/httpd/rainloop-ssl-access_log"

    SSLEngine on
    SSLCertificateFile "/etc/httpd/conf/ssl/rainloop.lan.crt"
    SSLCertificateKeyFile "/etc/httpd/conf/ssl/rainloop.lan.key"

    <FilesMatch ".(cgi|shtml|phtml|php)$">
        SSLOptions +StdEnvVars
    </FilesMatch>

    BrowserMatch "MSIE [2-5]"
        nokeepalive ssl-unclean-shutdown
        downgrade-1.0 force-response-1.0

    CustomLog "/var/log/httpd/ssl_request_log"
        "%t %h %{SSL_PROTOCOL}x %{SSL_CIPHER}x "%r" %b"

    <Directory />
        Options +Indexes +FollowSymLinks +ExecCGI
        AllowOverride All
        Order deny,allow
        Allow from all
        Require all granted
    </Directory>
</VirtualHost>
接下來將會自動生成Certificate和Keys文件,然後在文件中叫*Common Name的證書里中添加您的虛擬域名( rainloop.lan)。
$ sudo apache_gen_ssl
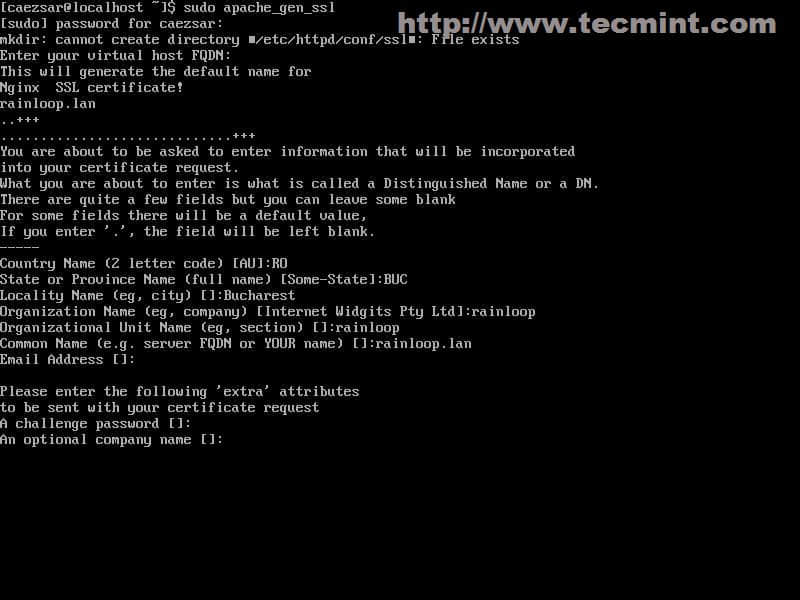
創建SSL證書和密鑰
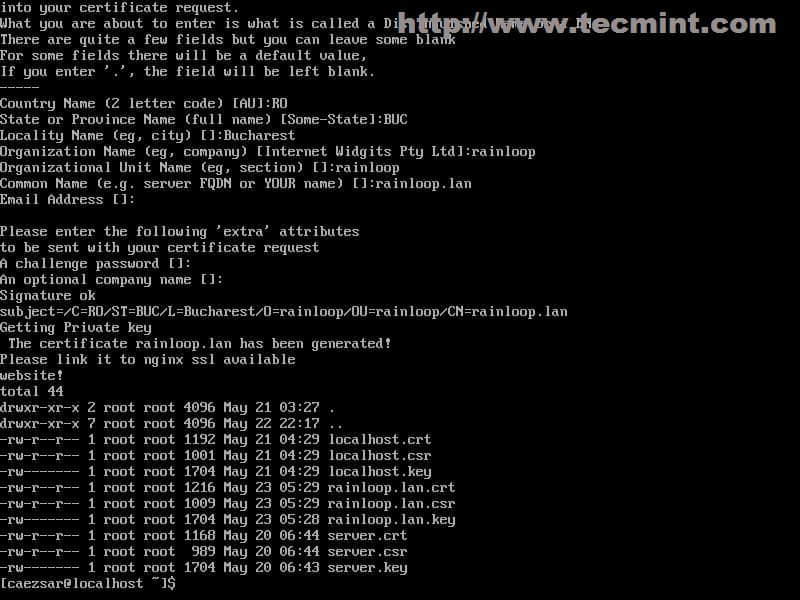
輸入組織信息
After the Certificate and SSL keys are created, add Rainloop DocumentRoot path, then enable Virtual Hosts and restart Apache daemon to apply configurations. 在證書和密鑰建立之後,創建 RainLoop 的 DocumentRoot 所指向的目錄,之後激活虛擬主機,並且重啟Apache應用設置。
$ sudo mkdir -p /srv/www/rainloop
$ sudo a2ensite rainloop
$ sudo a2ensite rainloop-ssl
$ sudo systemctl restart httpd

激活虛擬主機
Step 2: 添加必要的PHP支持
3. 無論您使用的是Apache或NginxWeb伺服器,您需要激活php.ini文件下中的PHP擴展,並將新伺服器的DocumentRoot目錄放到 open_basedir 配置中。
$ sudo nano /etc/php/php.ini
找到並且取消如下的PHP擴展的注釋(LCTT譯註,即啟用這些模塊):
extension=iconv.so
extension=imap.so
extension=mcrypt.so
extension=mssql.so
extension=mysqli.so
extension=openssl.so ( 註:啟用 IMAPS 和 SMTP SSL protocols)
extension=pdo_mysql.so
open_basedir語句應該看起來類似如下:
open_basedir = /srv/http/:/home/:/tmp/:/usr/share/pear/:/usr/share/webapps/:/etc/webapps/:/srv/www/
4. 在修改好php.ini之後,重啟你的伺服器,然後檢查 phpinfo() 輸出,去看看SSL協議是否已經激活。
----------對於 Apache Web 伺服器-------$ sudo systemctl restart httpd
----------對於 Nginx Web 伺服器-------$ sudo systemctl restart nginx
$ sudo systemctl restart php-fpm
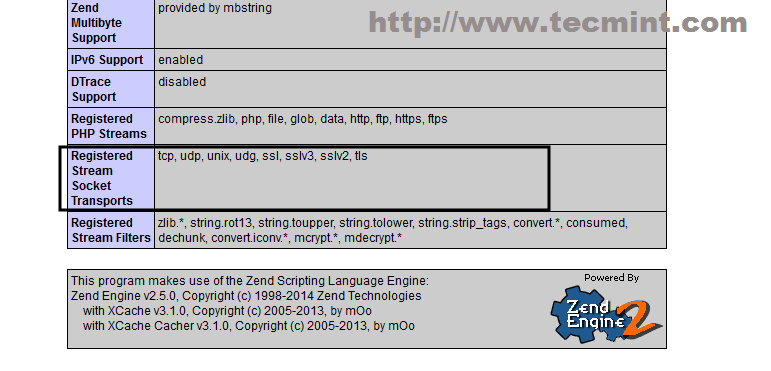
查看 PHP 信息
Step 3: 下載和安裝 RainLoop Webmail
5.現在可以從官方網站下載Rainloop應用並解壓縮到文檔根目錄了,但是需要首先安裝wget的和unzip程序(LCTT譯註,如果你已經有了可以忽略此步)。
$ sudo pacman -S unzip wget
6. 使用wget命令或通過使用瀏覽器訪問http://rainloop.net/downloads/下載最新的源碼包Rainloop 壓縮包。
$ wget http://repository.rainloop.net/v1/rainloop-latest.zip

下載 RainLoop 包
7. 下載過程完成後,解壓Rainloop壓縮包到虛擬主機文檔根目錄路徑( /srv/www/rainloop/ )。
$ sudo unzip rainloop-latest.zip -d /srv/www/rainloop/
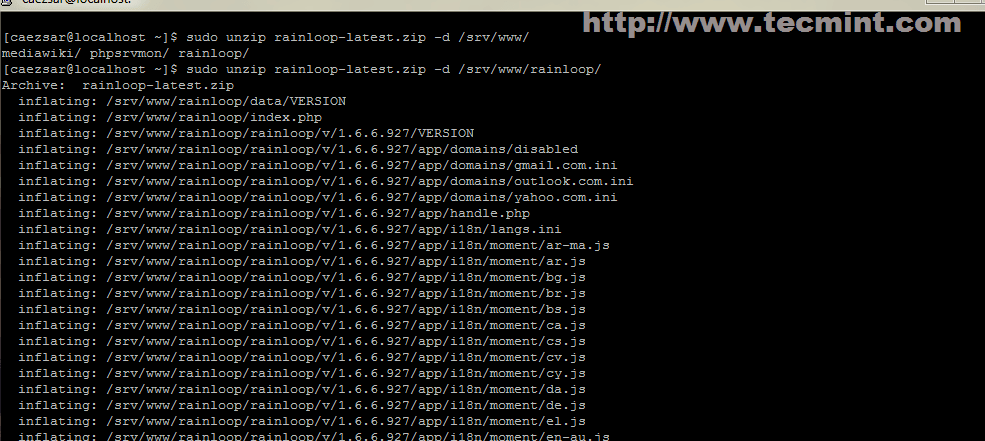
解壓
8. 然後設置應用程序的默認路徑下的許可權。
$ sudo chmod -R 755 /srv/www/rainloop/
$ sudo chown -R http:http /srv/www/rainloop/
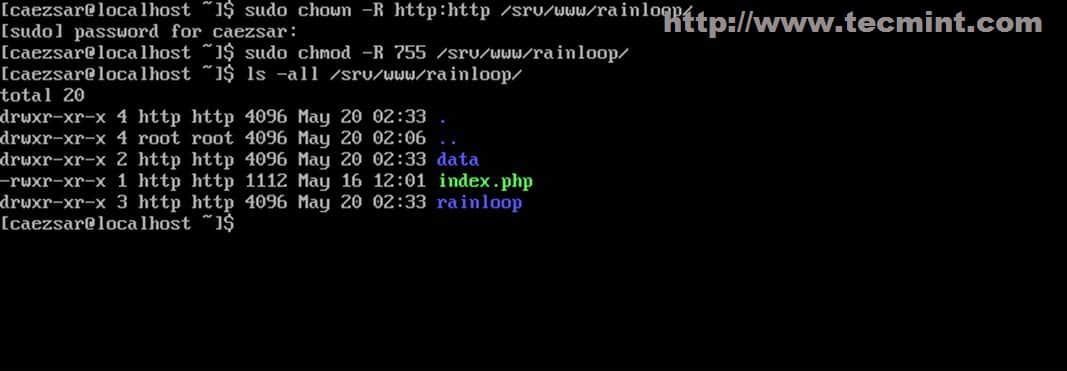
設置許可權
Step 4: 通過網頁配置RainLoop
9. Rainloop應用程序可以通過兩種方式進行配置:使用瀏覽器或者系統shell。如果要在終端配置就打開和編輯位於/ srv/www/rainloop/data/datada047852f16d2bc7352b24240a2f1599/default/configs/ 的application.ini**文件。
10. 若要從瀏覽器訪問管理界面,使用下面的URL地址 https://rainloop.lan/?admin,然後提供輸入默認的應用程序用戶名密碼,如下:
User = admin
Password = 12345
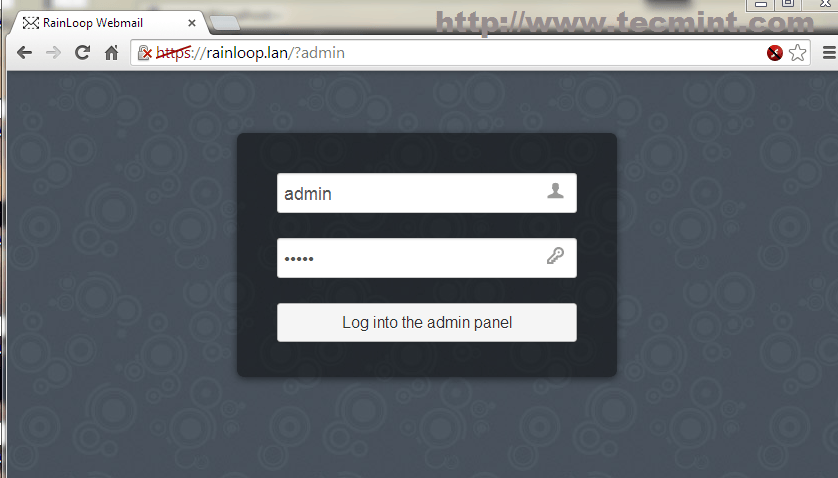
Rainloop Web 界面
11. 首次登錄後,你會被警示需要更改默認密碼,所以我勸你做這一點。
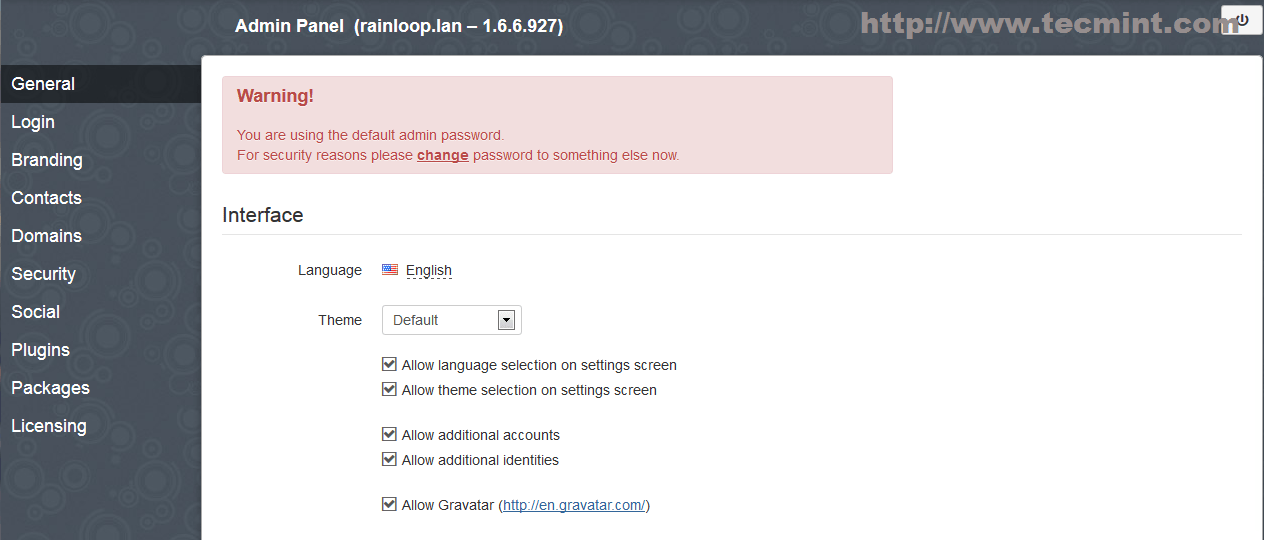
修改默認 Password
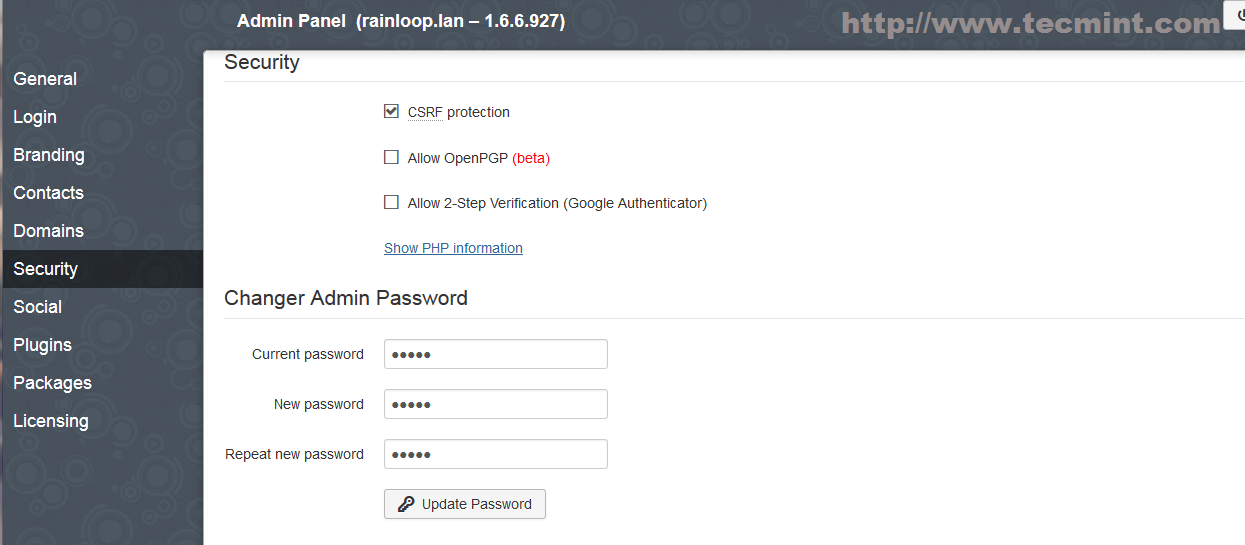
設置新的 Admin Password
12. 如果您要啟用Contact(聯繫人)功能,就登錄到MySQL資料庫並創建一個新的資料庫及其用戶,然後提供在Contacts欄位裡面輸入資料庫信息。
mysql -u root -p
create database if not exists rainloop;
create user rainloop_user@localhost identified by 「password」;
grant all privileges on rainloop.* to rainloop_user@localhost;
flush privileges;
exit;
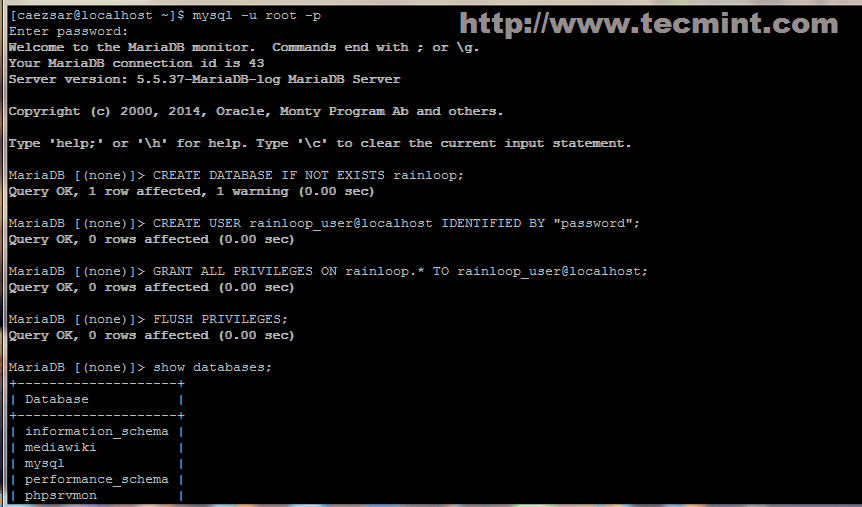
在 RainLoop 中激活聯繫人
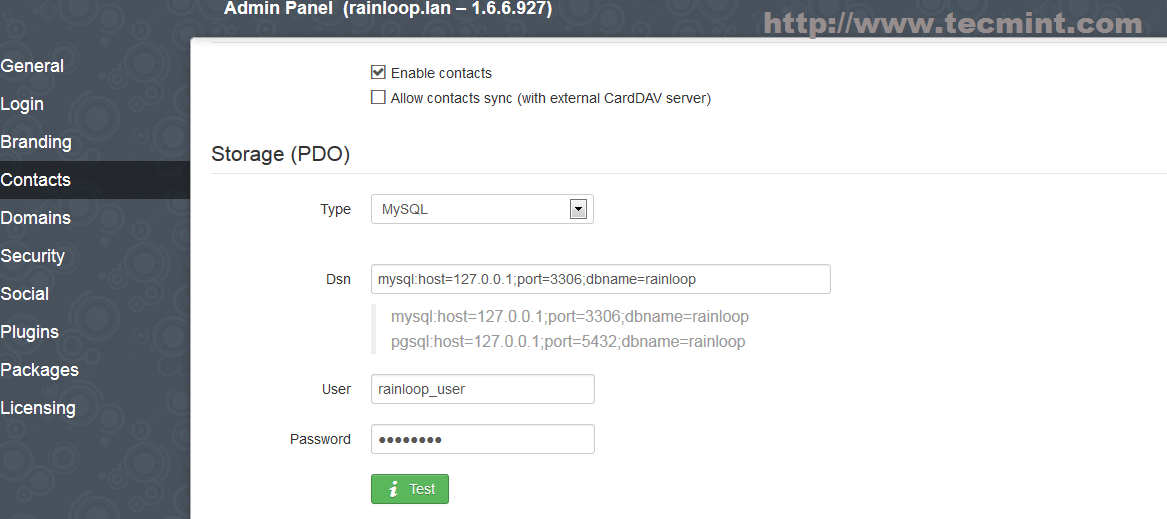
添加聯繫人資料庫配置
13. 默認情況下Rainloop提供了 Gmail,Yahoo和Outlook的郵件伺服器的配置文件,但是你如果願意,你也可以添加其他的郵件伺服器域。
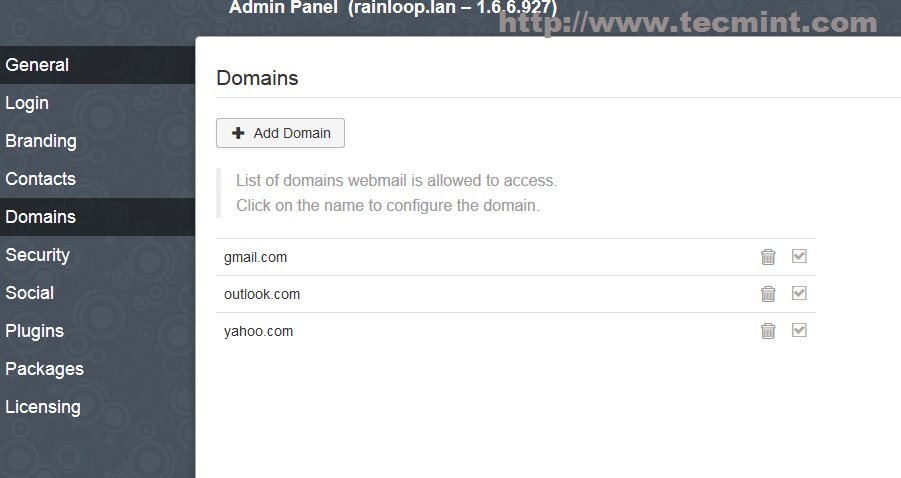
默認 Mail 域
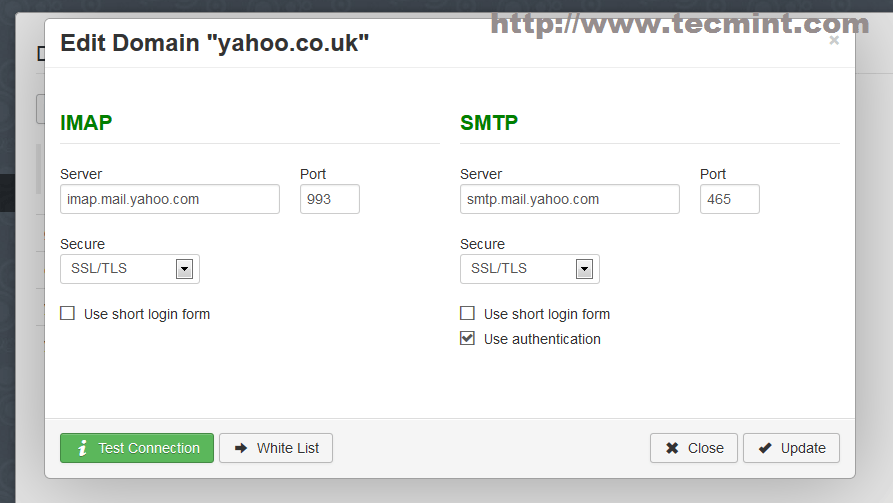
添加新域
14. 登錄你的郵件伺服器,訪問 https://rainloop.lan,並提供您的域名伺服器驗證信息。
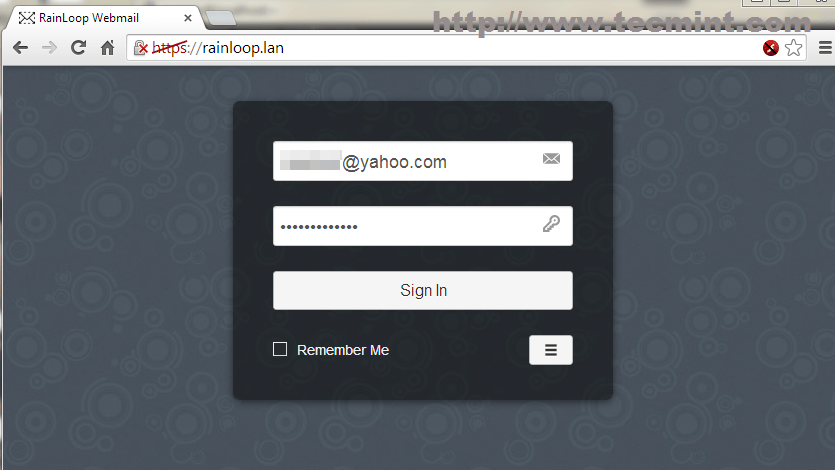
登錄到Yahoo郵件頁面
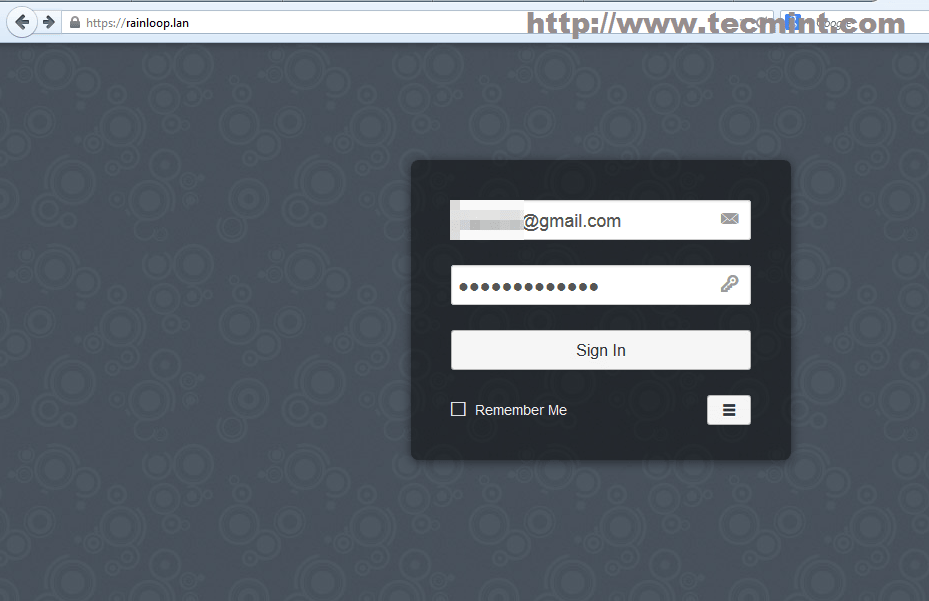
登錄Gmail
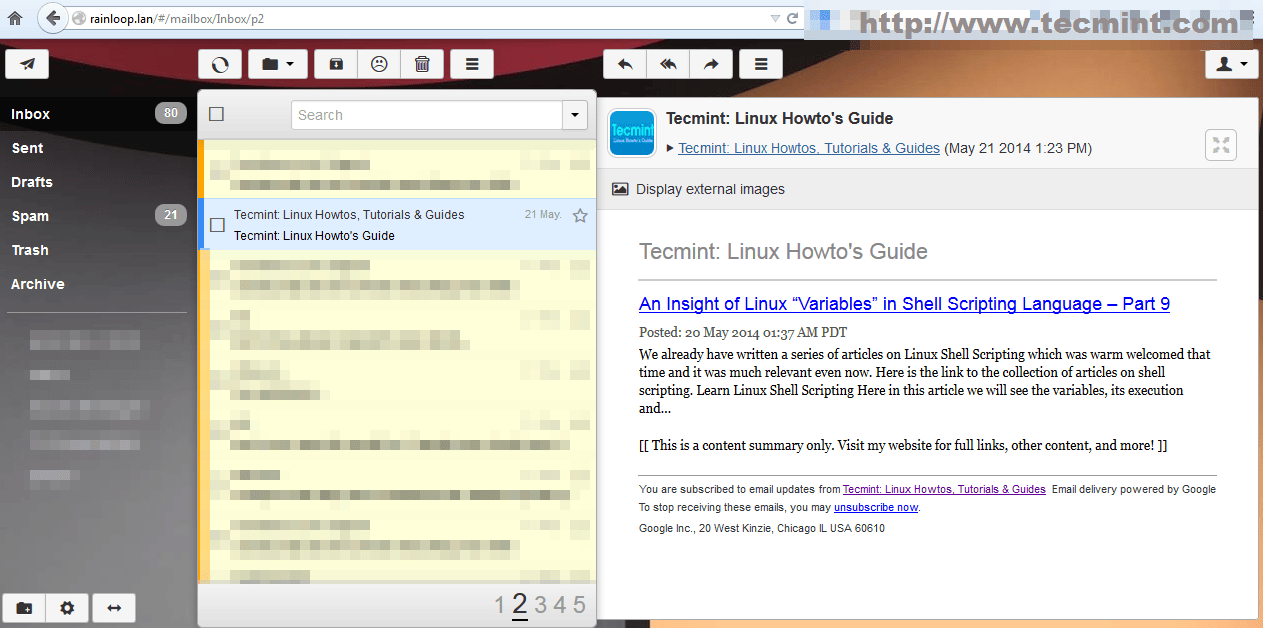
RainLoop 登錄後的Email 界面
想要了解更多的文件,可以訪問:http://rainloop.net/docs/.
通過Rainloop你可以從瀏覽器中訪問具有Internet連接的任何郵件伺服器。唯一的缺憾就是在Arch Linux下使用Rainloop應用的話,少一個修改電子郵件帳戶密碼的poppassd插件包。
via: http://www.tecmint.com/install-rainloop-webmail-in-arch-linux/
本文轉載來自 Linux 中國: https://github.com/Linux-CN/archive


