如何在Ubuntu 14.10 上安装WordPress?

介绍
如果你想快捷、简单、免费的创建个人网站的话,WordPress 是你最佳的选择。
WordPress 是一种使用 PHP 语言开发的博客平台,用户可以在支持 PHP 和 MySQL 数据库的服务器上架设属于自己的网站。也可以把 WordPress 当作一个内容管理系统( CMS )来使用。
sudo apt-get install apache2 mysql-server php5 libapache2-mod-php5 php5-gd php5-curl libssh2-php当 Apache, PHP, MySQL 都已经安装时,你就可以开始 WordPress 的安装之旅。 数据库和 MySQL 用户的创建 通过数据库和 MYSQL 用户的创建,你将开始个人网站的创建进程。 你需要为 MySQL 的 root 用户设置密码。 登录 MYSQL: mysql -u root -p 在成功认证之后你需要创建WordPress的数据库: CREATE DATABASE wordpress; 这里我将数据库名称命为 wordpress,可以自己定义。但请记住数据库名称,在后面的安装中将会用到。 现在,你需要创建数据库管理员:
CREATE USER wordpressadmin@localhost IDENTIFIED BY 'wordpresspassword';接着,你需要将管理权限赋给管理员:
GRANT ALL PRIVILEGES ON wordpress.* TO wordpressadmin@localhost;你需要刷新权限信息来激活用户权限:
FLUSH PRIVILEGES;
exit
PHP 和 Apache 的配置
接下来,你需要配置 PHP 和 Apache. 以 sudo 权限打开 Apache PHP 的配置文件:
sudo nano /etc/php5/apache2/php.ini搜索命令 expose_php 和 allow_url_fopen 将其置为 off:
. . .
expose_php = Off
. . .
allow_url_fopen = Off
. . .
改完之后保存并关闭。 接下来,你需要启用 Apahce 的重写功能( rewrite )。 启用 mod_rewrite 模块的命令:
sudo a2enmod rewrite重启 Apache 的服务之后该模块就启用了。 但是在重启 Apache 的服务之前你需要启用 .htaccess 的使用。 所以,打开包含实际重写和将在 WordPress 安装时默认包括的文件。
sudo nano /etc/apache2/sites-enabled/000-default.conf在这个文件里面,你必须添加重定向到 web 根目录的屏蔽。 可能你也需要 ServerName 命令来指向你的域名,用 ServerAdmin 命令来指向一个有效的电子邮件地址:
<VirtualHost *:80>
  ServerAdmin admin@your-domain.com
   DocumentRoot /var/www/html/
   ServerName your-domain.com
   ServerAlias www.your-domain.com
      <Directory /var/www/html/>
         Options Indexes FollowSymLinks MultiViews
         AllowOverride All
	 Order allow,deny
         allow from all
      </Directory>
   ErrorLog /var/log/apache2/your-domain.com-error_log
   CustomLog /var/log/apache2/your-domain.com-access_log common
</VirtualHost>
在完成以上步骤之后,重启 Apache 服务使配置生效。
sudo service apache2 restart下载并安装 WordPress
现在,系统已经准备就绪,我们可以开始 WordPress 的安装了! 回到你的服务器上,切换到你的临时目录并用 wget 去下载 WordPress
cd /tmpwget http://wordpress.org/latest.tar.gz下载完成后解压:
tar xzvf wordpress*现在,复制解压的目录到你的 web 目录下,推荐使用 rsync 安全复制文件:
cd wordpress*
sudo rsync -avz . /var/www/html
现在,你可以进入 web 目录检查复制的文件:
cd /var/www/html
ls -lsa
确保 WordPress 目录文件可写,同时,以 www-data 用户, www-data 属组运行(用户,属组可自定义):
chown www-data:www-data -R /var/www/html/

配置 WordPress
编辑 WordPress config.php 文件,
cp /var/www/html/wp-config-sample.php /var/www/html/wp-config.php
vi /var/www/html/wp-config.php
找到并修改数据库名称,数据库用户名, mysql root 密码:
[...]
// ** MySQL settings - You can get this info from your web host ** //
/** The name of the database for WordPress */
define('DB_NAME', 'wordpress');
/** MySQL database username */
define('DB_USER', 'wordpressadmin');
/** MySQL database password */
define('DB_PASSWORD', 'wordpresspassword');
/** MySQL hostname */
define('DB_HOST', 'localhost');
[...]
完成以上配置之后,重启 Apache 服务:
service apache2 restart安装 WordPress
通过以上操作,文件已经准备到位,软件也已配置完成。通过 web 接口就可以完成 WordPress 的安装了。 在你的浏览器中访问你的域名或者 IP 地址:
http://server_domain_name_or_IP你将看到 WordPress 的初始安装界面,你将创建一个管理员账号:
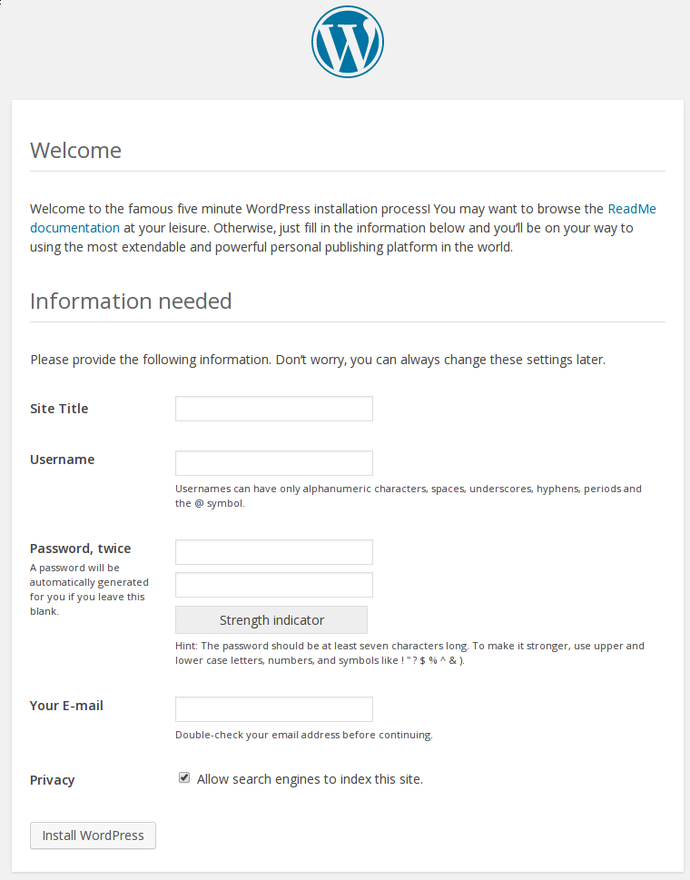
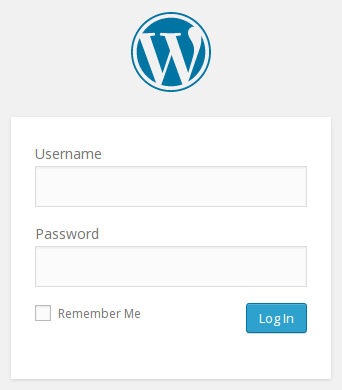
完成站点信息,创建你的管理账号。填写完毕之后点击 Install WordPress 按钮继续。 WordPress 将确认你的安装信息,然后要求你以刚才创建的账号登录:

点击 Log In 填写账号信息:
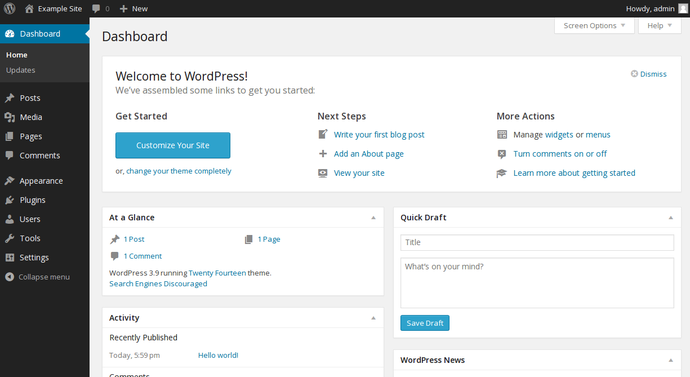
你可以通过域名或者 IP 地址访问你的站点了!
对这篇文章感觉如何?
You may also like


2 Comments
Leave a reply
More in:开源软件

Pwnagotchi 开箱教程
光速上手C++20协程

在 Linux 终端中管理您的密码

用 Scribus 来进行排版吧!


请问在这一步中,我如何知道ServiceName
ServerAdmin admin@your-domain.com
DocumentRoot /var/www/html/
ServerName your-domain.com
ServerAlias http://www.your-domain.com
Options Indexes FollowSymLinks MultiViews
AllowOverride All
Order allow,deny
allow from all
ErrorLog /var/log/apache2/your-domain.com-error_log
CustomLog /var/log/apache2/your-domain.com-access_log common
By the way,我注册了Hostgator的域名。