Securi-Pi:使用樹莓派作為安全跳板

備註
此解決方案能搞定大多數有限制的網路環境,但有些防火牆會對外部流量調用 深度包檢查 ,它們時常能屏蔽掉用本篇文章里的方式傳輸的信息。不過我到目前為止還沒在這樣的防火牆後測試過。同時,儘管我使用了很多基於密碼學的工具(OpenVPN,HTTPS,SSH),我並沒有非常嚴格地審計過這套配置方案(LCTT 譯註:作者的意思是指這套方案能幫你繞過埠限制,但不代表你的活動就是完全安全的)。有時候甚至 DNS 服務都會泄露你的信息,很可能在我沒有考慮周到的角落裡會有遺漏。我強烈不推薦把此跳板配置方案當作是萬無一失的隱藏網路流量的辦法,此配置只是希望能繞過一些埠限制連上網路,而不是做一些危險的事情。
起步
讓我們先從你需要什麼說起,我用的是樹莓派 2,裝載了最新版本的 Raspbian,不過這個配置也應該能在樹莓派 Model B 上運行;512MB 的內存對我們來說綽綽有餘了,雖然性能可能沒有樹莓派 2這麼好,畢竟相比於四核心的樹莓派 2, Model B 只有一顆單核心 CPU。我的樹莓派放置在家裡的防火牆和路由器的後面,所以我還能用這個樹莓派作為跳板訪問家裡的其他電子設備。同時這也意味著我的流量在互聯網上看起來彷彿來自我家的 ip 地址,所以這也算某種意義上保護了我的匿名性。如果你沒有樹莓派,或者不想從家裡運行這個服務,那你完全可以把這個配置放在一台小型雲伺服器上(LCTT 譯註:比如 IPS )。你只要確保伺服器運行著基於 Debian 的 Linux 發行版即可,這份指南依然可用。
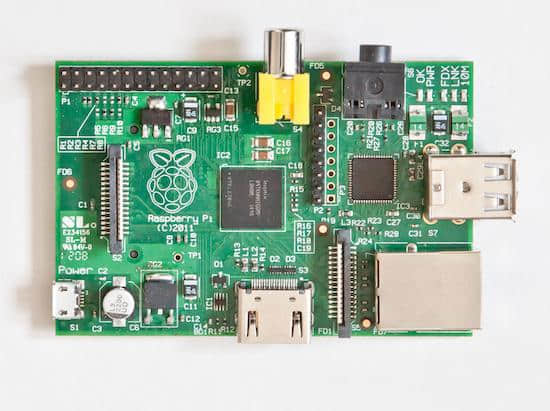
圖 1 樹莓派,即將成為我們的加密網路端點
安裝並配置 BIND
無論你是用樹莓派還是一台伺服器,當你成功啟動之後你就可以安裝 BIND 了,這是一個驅動了互聯網相當一部分的域名服務軟體。你將會把 BIND 僅僅作為緩存域名服務使用,而不用把它配置為用來處理來自互聯網的域名請求。安裝 BIND 會讓你擁有一個可以被 OpenVPN 使用的 DNS 伺服器。安裝 BIND 十分簡單,apt-get 就可以直接搞定:
root@test:~# apt-get install bind9
Reading package lists... Done
Building dependency tree
Reading state information... Done
The following extra packages will be installed:
  bind9utils
Suggested packages:
  bind9-doc resolvconf ufw
The following NEW packages will be installed:
  bind9 bind9utils
0 upgraded, 2 newly installed, 0 to remove and 0 not upgraded.
Need to get 490 kB of archives.
After this operation, 1,128 kB of additional disk space will be used.
Do you want to continue [Y/n]? y
在我們把 BIND 作為緩存域名伺服器之前,還有一些小細節需要配置。兩個修改都在/etc/bind/named.conf.options里完成。首先你要取消注釋掉 forwarders 這一節內容,同時你還要增加一個可以轉發域名請求的目標伺服器。作為例子我會用 Google 的 DNS 伺服器(8.8.8.8)(LCTT 譯註:國內的話需要找一個替代品);文件的 forwarders 節看上去大致是這樣的:
forwarders {
    8.8.8.8;
};
第二點你需要做的更改是允許來自內網和本機的查詢請求,直接把這一行加入配置文件的後面,記得放在最後一個};之前就可以了:
allow-query { 192.168.1.0/24; 127.0.0.0/16; };
上面那行配置會允許此 DNS 伺服器接收來自其所在的網路(在本例中,我的網路就在我的防火牆之後)和本機的請求。下一步,你需要重啟一下 BIND 的服務:
root@test:~# /etc/init.d/bind9 restart
[....] Stopping domain name service...: bind9
waiting for pid 13209 to die
. ok
[ ok ] Starting domain name service...: bind9.
現在你可以測試一下 nslookup 來確保你的服務正常運行了:
root@test:~# nslookup
> server localhost
Default server: localhost
Address: 127.0.0.1#53
> www.google.com
Server:     localhost
Address:    127.0.0.1#53

Non-authoritative answer:
Name:   www.google.com
Address: 173.194.33.176
Name:   www.google.com
Address: 173.194.33.177
Name:   www.google.com
Address: 173.194.33.178
Name:   www.google.com
Address: 173.194.33.179
Name:   www.google.com
Address: 173.194.33.180
完美!現在你的系統里已經有一個正常的域名服務在工作了,下一步我們來配置一下OpenVPN。
安裝並配置 OpenVPN
OpenVPN 是一個運用 SSL/TLS 作為密鑰交換的開源 VPN 解決方案。同時它也非常便於在 Linux 環境下部署。配置 OpenVPN 可能有一點點難,不過其實你也不需要在默認的配置文件里做太多修改。首先你需要運行一下 apt-get 來安裝 OpenVPN:
root@test:~# apt-get install openvpn
Reading package lists... Done
Building dependency tree
Reading state information... Done
The following extra packages will be installed:
  liblzo2-2 libpkcs11-helper1
Suggested packages:
  resolvconf
The following NEW packages will be installed:
  liblzo2-2 libpkcs11-helper1 openvpn
0 upgraded, 3 newly installed, 0 to remove and 0 not upgraded.
Need to get 621 kB of archives.
After this operation, 1,489 kB of additional disk space will be used.
Do you want to continue [Y/n]? y
現在 OpenVPN 已經安裝好了,你需要去配置它了。OpenVPN 是基於 SSL 的,並且它同時依賴於服務端和客戶端兩方的證書來工作。為了生成這些證書,你需要在機器上配置一個證書籤發(CA)。幸運地,OpenVPN 在安裝中自帶了一些用於生成證書的腳本比如 「easy-rsa」 來幫助你加快這個過程。你將要創建一個文件目錄用於放置 easy-rsa 腳本,從模板目錄複製過來:
root@test:~# mkdir /etc/openvpn/easy-rsa
root@test:~# cp -rpv /usr/share/doc/openvpn/examples/easy-rsa/2.0/* /etc/openvpn/easy-rsa/
下一步,把 vars 文件複製一個備份:
root@test:/etc/openvpn/easy-rsa# cp vars vars.bak
接下來,編輯一下 vars 以讓其中的信息符合你的狀態。我將以我需要編輯的信息作為例子:
KEY_SIZE=4096
KEY_COUNTRY="US"
KEY_PROVINCE="CA"
KEY_CITY="Silicon Valley"
KEY_ORG="Linux Journal"
KEY_EMAIL="bill.childers@linuxjournal.com"
下一步是導入(source)一下 vars 中的環境變數,這樣系統就能把其中的信息當作環境變數處理了:
root@test:/etc/openvpn/easy-rsa# source ./vars
NOTE: If you run ./clean-all, I will be doing a rm -rf on /etc/openvpn/easy-rsa/keys
搭建 CA(證書籤發)
接下來你要運行一下 clean-all 來確保有一個清理乾淨的系統工作環境,緊接著你就要做證書籤發了。注意一下我修改了一些 changeme 的所提示修改的內容以符合我需要的安裝情況:
root@test:/etc/openvpn/easy-rsa# ./clean-all
root@test:/etc/openvpn/easy-rsa# ./build-ca
Generating a 4096 bit RSA private key
...................................................++
...................................................++
writing new private key to 'ca.key'
--You are about to be asked to enter information that
will be incorporated into your certificate request.
What you are about to enter is what is called a
Distinguished Name or a DN.
There are quite a few fields but you can leave some
blank. For some fields there will be a default value,
If you enter '.', the field will be left blank.
--Country Name (2 letter code) [US]:
State or Province Name (full name) [CA]:
Locality Name (eg, city) [Silicon Valley]:
Organization Name (eg, company) [Linux Journal]:
Organizational Unit Name (eg, section) [changeme]:SecTeam
Common Name (eg, your name or your server's hostname [changeme]:test.linuxjournal.com
Name [changeme]:test.linuxjournal.com
Email Address [bill.childers@linuxjournal.com]:
生成服務端證書
一旦 CA 創建好了,你接著就可以生成客戶端的 OpenVPN 證書了:
root@test:/etc/openvpn/easy-rsa# ./build-key-server test.linuxjournal.com
Generating a 4096 bit RSA private key
...................................................++
writing new private key to 'test.linuxjournal.com.key'
--You are about to be asked to enter information that
will be incorporated into your certificate request.
What you are about to enter is what is called a
Distinguished Name or a DN.
There are quite a few fields but you can leave some
blank. For some fields there will be a default value,
If you enter '.', the field will be left blank.
--Country Name (2 letter code) [US]:
State or Province Name (full name) [CA]:
Locality Name (eg, city) [Silicon Valley]:
Organization Name (eg, company) [Linux Journal]:
Organizational Unit Name (eg, section) [changeme]:SecTeam
Common Name (eg, your name or your server's hostname) [test.linuxjournal.com]:
Name [changeme]:test.linuxjournal.com
Email Address [bill.childers@linuxjournal.com]:

Please enter the following 'extra' attributes
to be sent with your certificate request
A challenge password []:
An optional company name []:
Using configuration from /etc/openvpn/easy-rsa/openssl-1.0.0.cnf
Check that the request matches the signature
Signature ok
The Subject's Distinguished Name is as follows
countryName           :PRINTABLE:'US'
stateOrProvinceName   :PRINTABLE:'CA'
localityName          :PRINTABLE:'Silicon Valley'
organizationName      :PRINTABLE:'Linux Journal'
organizationalUnitName:PRINTABLE:'SecTeam'
commonName            :PRINTABLE:'test.linuxjournal.com'
name                  :PRINTABLE:'test.linuxjournal.com'
emailAddress          :IA5STRING:'bill.childers@linuxjournal.com'
Certificate is to be certified until Sep  1 06:23:59 2025 GMT (3650 days)
Sign the certificate? [y/n]:y

1 out of 1 certificate requests certified, commit? [y/n]y
Write out database with 1 new entries
Data Base Updated
下一步需要用掉一些時間來生成 OpenVPN 伺服器需要的 Diffie-Hellman 密鑰。這個步驟在一般的桌面級 CPU 上會需要幾分鐘的時間,但在 ARM 構架的樹莓派上,會用掉超級超級長的時間。耐心點,只要終端上的點還在跳,那麼一切就在按部就班運行(下面的示例省略了不少的點):
root@test:/etc/openvpn/easy-rsa# ./build-dh
Generating DH parameters, 4096 bit long safe prime,
 ↪generator 2
This is going to take a long time
....................................................+
<省略了不少的點>
生成客戶端證書
現在你要生成一下客戶端用於登錄 OpenVPN 的密鑰。通常來說 OpenVPN 都會被配置成使用證書驗證的加密方式,在這個配置下客戶端需要持有由服務端簽發的一份證書:
root@test:/etc/openvpn/easy-rsa# ./build-key bills-computer
Generating a 4096 bit RSA private key
...................................................++
...................................................++
writing new private key to 'bills-computer.key'
--You are about to be asked to enter information that
will be incorporated into your certificate request.
What you are about to enter is what is called a
Distinguished Name or a DN. There are quite a few
fields but you can leave some blank.
For some fields there will be a default value,
If you enter '.', the field will be left blank.
--Country Name (2 letter code) [US]:
State or Province Name (full name) [CA]:
Locality Name (eg, city) [Silicon Valley]:
Organization Name (eg, company) [Linux Journal]:
Organizational Unit Name (eg, section) [changeme]:SecTeam
Common Name (eg, your name or your server's hostname) [bills-computer]:
Name [changeme]:bills-computer
Email Address [bill.childers@linuxjournal.com]:

Please enter the following 'extra' attributes
to be sent with your certificate request
A challenge password []:
An optional company name []:
Using configuration from /etc/openvpn/easy-rsa/openssl-1.0.0.cnf
Check that the request matches the signature
Signature ok
The Subject's Distinguished Name is as follows
countryName           :PRINTABLE:'US'
stateOrProvinceName   :PRINTABLE:'CA'
localityName          :PRINTABLE:'Silicon Valley'
organizationName      :PRINTABLE:'Linux Journal'
organizationalUnitName:PRINTABLE:'SecTeam'
commonName            :PRINTABLE:'bills-computer'
name                  :PRINTABLE:'bills-computer'
emailAddress          :IA5STRING:'bill.childers@linuxjournal.com'
Certificate is to be certified until Sep  1 07:35:07 2025 GMT (3650 days)
Sign the certificate? [y/n]:y

1 out of 1 certificate requests certified, commit? [y/n]y
Write out database with 1 new entries
Data Base Updated
root@test:/etc/openvpn/easy-rsa#
現在你需要再生成一個 HMAC 碼作為共享密鑰來進一步增加整個加密提供的安全性:
root@test:~# openvpn --genkey --secret /etc/openvpn/easy-rsa/keys/ta.key
配置伺服器
最後,我們到了配置 OpenVPN 服務的時候了。你需要創建一個 /etc/openvpn/server.conf 文件;這個配置文件的大多數地方都可以套用模板解決。設置 OpenVPN 服務的主要修改在於讓它只用 TCP 而不是 UDP 鏈接。這是下一步所必需的---如果不是 TCP 連接那麼你的服務將不能工作在埠 443 上。創建 /etc/openvpn/server.conf 然後把下述配置丟進去:
port 1194
proto tcp
dev tun
ca easy-rsa/keys/ca.crt
cert easy-rsa/keys/test.linuxjournal.com.crt ## or whatever your hostname was
key easy-rsa/keys/test.linuxjournal.com.key  ## Hostname key- This file should be kept secret
management localhost 7505
dh easy-rsa/keys/dh4096.pem
tls-auth /etc/openvpn/certs/ta.key 0
server 10.8.0.0 255.255.255.0 # The server will use this subnet for clients connecting to it
ifconfig-pool-persist ipp.txt
push "redirect-gateway def1 bypass-dhcp" # Forces clients to redirect all traffic through the VPN
push "dhcp-option DNS 192.168.1.1" # Tells the client to use the DNS server at 192.168.1.1 for DNS - replace with the IP address of the OpenVPN machine and clients will use the BIND server setup earlier
keepalive 30 240
comp-lzo # Enable compression
persist-key
persist-tun
status openvpn-status.log
verb 3
最後,你將需要在伺服器上啟用 IP 轉發,配置 OpenVPN 為開機啟動,並立刻啟動 OpenVPN 服務:
root@test:/etc/openvpn/easy-rsa/keys# echo "net.ipv4.ip_forward = 1" >> /etc/sysctl.conf
root@test:/etc/openvpn/easy-rsa/keys# sysctl -p /etc/sysctl.conf
net.core.wmem_max = 12582912
net.core.rmem_max = 12582912
net.ipv4.tcp_rmem = 10240 87380 12582912
net.ipv4.tcp_wmem = 10240 87380 12582912
net.core.wmem_max = 12582912
net.core.rmem_max = 12582912
net.ipv4.tcp_rmem = 10240 87380 12582912
net.ipv4.tcp_wmem = 10240 87380 12582912
net.core.wmem_max = 12582912
net.core.rmem_max = 12582912
net.ipv4.tcp_rmem = 10240 87380 12582912
net.ipv4.tcp_wmem = 10240 87380 12582912
net.ipv4.ip_forward = 0
net.ipv4.ip_forward = 1

root@test:/etc/openvpn/easy-rsa/keys# update-rc.d openvpn defaults
update-rc.d: using dependency based boot sequencing

root@test:/etc/openvpn/easy-rsa/keys# /etc/init.d/openvpn start
[ ok ] Starting virtual private network daemon:.
配置 OpenVPN 客戶端
客戶端的安裝取決於客戶端的操作系統,但你需要將之前生成的證書和密鑰複製到你的客戶端上,並導入你的 OpenVPN 客戶端並新建一個配置文件。每種操作系統下的 OpenVPN 客戶端在操作上會有些稍許不同,這也不在這篇文章的覆蓋範圍內,所以你最好去看看特定操作系統下的 OpenVPN 文檔來獲取更多信息。請參考本文檔里的資源那一節。
安裝 SSLH —— "魔法"多協議切換工具
本文章介紹的解決方案最有趣的部分就是運用 SSLH 了。SSLH 是一個多重協議工具——它可以監聽 443 埠的流量,然後分析他們是 SSH,HTTPS 還是 OpenVPN 的通訊包,並把它們分別轉發給正確的系統服務。這就是為何本解決方案可以讓你繞過大多數埠封殺——你可以一直使用 HTTPS 通訊,因為它幾乎從來不會被封殺。
同樣,直接 apt-get 安裝:
root@test:/etc/openvpn/easy-rsa/keys# apt-get install sslh
Reading package lists... Done
Building dependency tree
Reading state information... Done
The following extra packages will be installed:
  apache2 apache2-mpm-worker apache2-utils apache2.2-bin apache2.2-common
  libapr1 libaprutil1 libaprutil1-dbd-sqlite3 libaprutil1-ldap libconfig9
Suggested packages:
  apache2-doc apache2-suexec apache2-suexec-custom openbsd-inetd inet-superserver
The following NEW packages will be installed:
  apache2 apache2-mpm-worker apache2-utils apache2.2-bin apache2.2-common
  libapr1 libaprutil1 libaprutil1-dbd-sqlite3 libaprutil1-ldap libconfig9 sslh
0 upgraded, 11 newly installed, 0 to remove and 0 not upgraded.
Need to get 1,568 kB of archives.
After this operation, 5,822 kB of additional disk space will be used.
Do you want to continue [Y/n]? y
在 SSLH 被安裝之後,包管理器會詢問要在 inetd 還是 standalone 模式下允許。選擇 standalone 模式,因為你希望 SSLH 在它自己的進程里運行。如果你沒有安裝 Apache,apt 包管理器會自動幫你下載並安裝的,儘管它也不是完全不可或缺。如果你已經有 Apache 了,那你需要確保它只監聽 localhost 埠而不是所有的埠(不然的話 SSLH 會無法運行,因為 443 埠已經被 Apache 監聽佔用)。安裝後,你會看到一個如下所示的錯誤信息:
[....] Starting ssl/ssh multiplexer: sslhsslh disabled, please adjust the configuration to your needs
[FAIL] and then set RUN to 'yes' in /etc/default/sslh to enable it. ... failed!
failed!
這其實並不是錯誤信息,只是 SSLH 在提醒你它還未被配置所以無法啟動,這很正常。配置 SSLH 相對來說比較簡單。它的配置文件放置在 /etc/default/sslh,你只需要修改 RUN 和 DAEMON_OPTS 變數就可以了。我的 SSLH 配置文件如下所示:
# Default options for sslh initscript
# sourced by /etc/init.d/sslh

# Disabled by default, to force yourself
# to read the configuration:
# - /usr/share/doc/sslh/README.Debian (quick start)
# - /usr/share/doc/sslh/README, at "Configuration" section
# - sslh(8) via "man sslh" for more configuration details.
# Once configuration ready, you *must* set RUN to yes here
# and try to start sslh (standalone mode only)

RUN=yes

# binary to use: forked (sslh) or single-thread (sslh-select) version
DAEMON=/usr/sbin/sslh

DAEMON_OPTS="--user sslh --listen 0.0.0.0:443 --ssh 127.0.0.1:22 --ssl 127.0.0.1:443 --openvpn 127.0.0.1:1194 --pidfile /var/run/sslh/sslh.pid"
保存編輯並啟動 SSLH:
root@test:/etc/openvpn/easy-rsa/keys# /etc/init.d/sslh start
[ ok ] Starting ssl/ssh multiplexer: sslh.
現在你應該可以從 443 埠 ssh 到你的樹莓派了,它會正確地使用 SSLH 轉發:
$ ssh -p 443 root@test.linuxjournal.com
root@test:~#
SSLH 現在開始監聽埠 443 並且可以轉發流量信息到 SSH、Apache 或者 OpenVPN ,這取決於抵達流量包的類型。這套系統現已整裝待發了!
結論
現在你可以啟動 OpenVPN 並且配置你的客戶端連接到伺服器的 443 埠了,然後 SSLH 會從那裡把流量轉發到伺服器的 1194 埠。但鑒於你正在和伺服器的 443 埠通信,你的 VPN 流量不會被封鎖。現在你可以舒服地坐在陌生小鎮的咖啡店裡,暢通無阻地通過你的樹莓派上的 OpenVPN 瀏覽互聯網。你順便還給你的鏈接增加了一些安全性,這個額外作用也會讓你的鏈接更安全和私密一些。享受通過安全跳板瀏覽互聯網把!
參考資源
- 安裝與配置 OpenVPN: https://wiki.debian.org/OpenVPN 和 http://cryptotap.com/articles/openvpn
- OpenVPN 客戶端下載: https://openvpn.net/index.php/open-source/downloads.html
- OpenVPN iOS 客戶端: https://itunes.apple.com/us/app/openvpn-connect/id590379981?mt=8
- OpenVPN Android 客戶端: https://play.google.com/store/apps/details?id=net.openvpn.openvpn&hl=en
- Tunnelblick for Mac OS X (OpenVPN 客戶端): https://tunnelblick.net
- SSLH 介紹: http://www.rutschle.net/tech/sslh.shtml 和 https://github.com/yrutschle/sslh
via: http://www.linuxjournal.com/content/securi-pi-using-raspberry-pi-secure-landing-point?page=0,0
作者:Bill Childers 譯者:Moelf 校對:wxy
本文轉載來自 Linux 中國: https://github.com/Linux-CN/archive
對這篇文章感覺如何?
You may also like


More in:Linux中國

捐贈 Let's Encrypt,共建安全的互聯網
Let's Encrypt 正式發布,已經保護 380 萬個域名

關於Linux防火牆iptables的面試問答
Lets Encrypt 已被所有主流瀏覽器所信任