如何在 CentOS / RHEL 上設置 SSH 免密碼登錄

作為系統管理員,你計劃在 Linux 上使用 OpenSSH,完成日常工作的自動化,比如文件傳輸、備份資料庫轉儲文件到另一台伺服器等。為實現該目標,你需要從主機 A 能自動登錄到主機 B。自動登錄也就是說,要在 shell 腳本中使用ssh,而無需要輸入任何密碼。
本文會告訴你怎樣在 CentOS/RHEL 上設置 SSH 免密碼登錄。自動登錄配置好以後,你可以通過它使用 SSH (Secure Shell)和安全複製 (SCP)來移動文件。
SSH 是開源的,是用於遠程登錄的最為可靠的網路協議。系統管理員用它來執行命令,以及通過 SCP 協議在網路上向另一台電腦傳輸文件。
通過配置 SSH 免密碼登錄,你可以享受到如下的便利:
- 用腳本實現日常工作的自動化。
- 增強 Linux 伺服器的安全性。這是防範虛擬專用伺服器(VPS)遭受暴力破解攻擊的一個推薦的方法,SSH 密鑰單憑暴力破解是幾乎不可攻破的。
什麼是 ssh-keygen
ssh-keygen 是一個用來生成、創建和管理 SSH 認證用的公私鑰的工具。通過 ssh-keygen 命令,用戶可以創建支持SSH1 和 SSH2 兩個協議的密鑰。ssh-keygen 為 SSH1 協議創建 RSA 密鑰,SSH2 則可以是 RSA 或 DSA。
什麼是 ssh-copy-id
ssh-copy-id 是用來將本地公鑰拷貝到遠程的 authorizedkeys 文件的腳本命令,它還會將身份標識文件追加到遠程機器的 ~/.ssh/authorized**keys 文件中,並給遠程主機的用戶主目錄適當的的許可權。
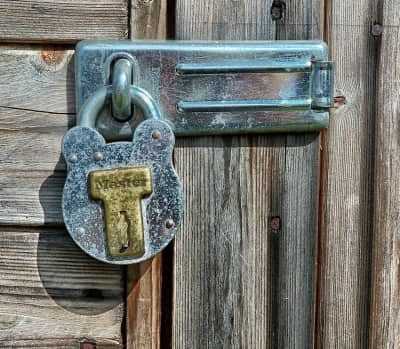
SSH 密鑰
SSH 密鑰為登錄 Linux 伺服器提供了更好且安全的機制。運行 ssh-keygen 後,將會生成公私密鑰對。你可以將公鑰放置到任意伺服器,從持有私鑰的客戶端連接到伺服器的時,會用它來解鎖。兩者匹配時,系統無需密碼就能解除鎖定。
在 CentOS 和 RHEL 上設置免密碼登錄 SSH
以下步驟在 CentOS 5/6/7、RHEL 5/6/7 和 Oracle Linux 6/7 上測試通過。
節點1 : 192.168.0.9 節點2 : 192.168.l.10
步驟1 :
測試節點1到節點2的連接和訪問:
[root@node1 ~]# ssh root@192.168.0.10
The authenticity of host '192.168.0.10 (192.168.0.10)' can't be established.
RSA key fingerprint is 6d:8f:63:9b:3b:63:e1:72:b3:06:a4:e4:f4:37:21:42.
Are you sure you want to continue connecting (yes/no)? yes
Warning: Permanently added '192.168.0.10' (RSA) to the list of known hosts.
root@192.168.0.10's password:
Last login: Thu Dec 10 22:04:55 2015 from 192.168.0.1
[root@node2 ~]#
步驟二:
使用 ssh-key-gen 命令生成公鑰和私鑰,這裡要注意的是可以對私鑰進行加密保護以增強安全性。
[root@node1 ~]# ssh-keygen
Generating public/private rsa key pair.
Enter file in which to save the key (/root/.ssh/id_rsa):
Enter passphrase (empty for no passphrase):
Enter same passphrase again:
Your identification has been saved in /root/.ssh/id_rsa.
Your public key has been saved in /root/.ssh/id_rsa.pub.
The key fingerprint is:
b4:51:7e:1e:52:61:cd:fb:b2:98:4b:ad:a1:8b:31:6d root@node1.ehowstuff.local
The key's randomart image is:
+--[ RSA 2048]----+
|          . ++   |
|         o o  o  |
|        o o o  . |
|       . o + ..  |
|        S   .  . |
|         .   .. .|
|        o E oo.o |
|         = ooo.  |
|        . o.o.   |
+-----------------+
步驟三:
用 ssh-copy-id 命令將公鑰複製或上傳到遠程主機,並將身份標識文件追加到節點2的 ~/.ssh/authorized_keys 中:
[root@node1 ~]# ssh-copy-id -i ~/.ssh/id_rsa.pub 192.168.0.10
root@192.168.0.10's password:
Now try logging into the machine, with "ssh '192.168.0.10'", and check in:

.ssh/authorized_keys

to make sure we haven't added extra keys that you weren't expecting.
步驟四:
驗證免密碼 SSH 登錄節點2:
[root@node1 ~]# ssh root@192.168.0.10
Last login: Sun Dec 13 14:03:20 2015 from www.ehowstuff.local
我希望這篇文章能幫助到你,為你提供 SSH 免密碼登錄 CentOS / RHEL 的基本認知和快速指南。
原載: http://www.ehowstuff.com/ssh-login-without-password-centos/
本文轉載來自 Linux 中國: https://github.com/Linux-CN/archive
對這篇文章感覺如何?
You may also like


More in:Linux中國
捐贈 Let's Encrypt,共建安全的互聯網
Let's Encrypt 正式發布,已經保護 380 萬個域名

關於Linux防火牆iptables的面試問答
Lets Encrypt 已被所有主流瀏覽器所信任