如何在 FreeBSD 10.2 上安裝使用 Nginx 的 Ghost

在這篇指南中我們會在 FreeBSD 上安裝使用 Nginx 作為 web 伺服器的 Ghost。我們會在 FreeBSD 10.2 上安裝 Node.js、Npm、nginx 和 sqlite3。
第一步 - 安裝 Node.js npm 和 Sqlite3
如果你想在你的伺服器上運行 ghost,你必須安裝 node.js。在這一部分,我們會從 freebsd 移植軟體庫中安裝 node.js,請進入庫目錄 "/usr/ports/www/node" 並通過運行命令 "make" 安裝。
cd /usr/ports/www/node
make install clean
如果你已經安裝了 node.js,那就進入到 npm 目錄並安裝它。npm 是用於安裝、發布和管理 node 程序的軟體包管理器。
cd /usr/ports/www/npm/
make install clean
下一步,安裝 sqlite3。默認情況下 ghost 使用 sqlite3 作為資料庫系統,但它也支持 mysql/mariadb 和 postgresql。我們會使用 sqlite3 作為默認資料庫。
cd /usr/ports/databases/sqlite3/
make install clean
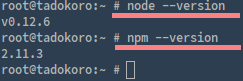
如果安裝完了所有軟體,還有檢查 node.js 和 npm 的版本:
node --version
v0.12.6

npm --version
2.11.3

sqlite3 --version
3.8.10.2
第二步 - 添加 Ghost 用戶
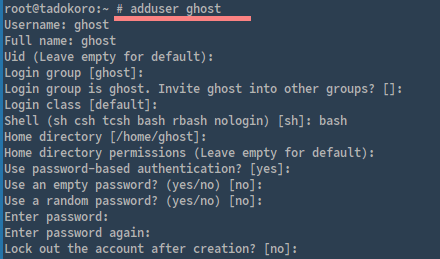
我們會以普通用戶 "ghost" 身份安裝和運行 ghost。用 "adduser" 命令添加新用戶:
adduser ghost
FILL With Your INFO
第三步 - 安裝 Ghost
我們會把 ghost 安裝到 "/var/www/" 目錄,首先新建目錄然後進入到安裝目錄:
mkdir -p /var/www/
cd /var/www/
用 wget 命令下載最新版本的 ghost:
wget --no-check-certificate https://ghost.org/zip/ghost-latest.zip
把它解壓到 "ghost" 目錄:
unzip -d ghost ghost-latest.zip
下一步,更改屬主為 "ghost",我們會以這個用戶安裝和運行它。
chown -R ghost:ghost ghost/
都做完了的話,通過輸入以下命令切換到 "ghost" 用戶:
su - ghost
然後進入到安裝目錄"/var/www/ghost/":
cd /var/www/ghost/
在安裝 ghost 之前,我們需要為 node.js 安裝 sqlite3 模塊,用 npm 命令安裝:
setenv CXX c++ ; npm install sqlite3 --sqlite=/usr/local
注意: 以 「ghost」 用戶運行,而不是 root 用戶。
現在,我們準備好安裝 ghost 了,用 npm 命令安裝:
npm install --production
下一步,複製配置文件 "config.example.js" 為 "config.js",用 nano 編輯器編輯:
cp config.example.js config.js
nano -c config.js
更改 server 模塊的第 25 行:
host: '0.0.0.0',
保存並退出。
現在用下面的命令運行 ghost:
npm start --production
通過訪問伺服器 ip 和 2368 號埠驗證一下。
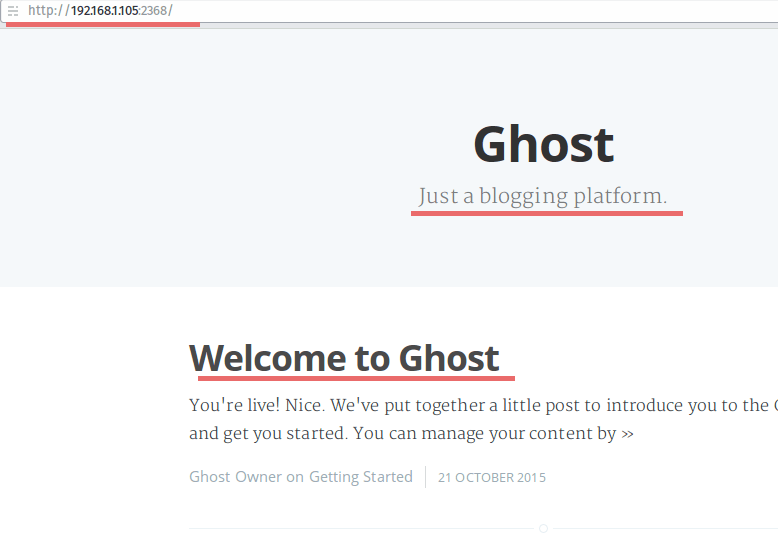
以 「ghost」 用戶在 "/var/www/ghost" 目錄安裝了 ghost。
第四步 - 作為 FreeBSD 服務運行 Ghost
要在 freebsd 上以服務形式運行應用,你需要在 rc.d 目錄添加腳本。我們會在 "/usr/local/etc/rc.d/" 目錄為 ghost 創建新的服務腳本。
在創建服務腳本之前,為了以服務形式運行 ghost,我們需要安裝一個 node.js 模塊,用 npm 命令以 sudo/root 許可權安裝 forever 模塊:
npm install forever -g
現在進入到 rc.d 目錄並創建名為 ghost 的新文件:
cd /usr/local/etc/rc.d/
nano -c ghost
粘貼下面的服務腳本:
#!/bin/sh

# PROVIDE: ghost
# KEYWORD: shutdown
PATH="/sbin:/bin:/usr/sbin:/usr/bin:/usr/local/sbin:/usr/local/bin"

. /etc/rc.subr

name="ghost"
rcvar="ghost_enable"
extra_commands="status"

load_rc_config ghost
: ${ghost_enable:="NO"}

status_cmd="ghost_status"
start_cmd="ghost_start"
stop_cmd="ghost_stop"
restart_cmd="ghost_restart"

ghost="/var/www/ghost"
log="/var/log/ghost/ghost.log"
ghost_start() {
sudo -u ghost sh -c "cd $ghost && NODE_ENV=production forever start -al $log index.js"
}

ghost_stop() {
sudo -u ghost sh -c "cd $ghost && NODE_ENV=production forever stop index.js"
}

ghost_status() {
sudo -u ghost sh -c "NODE_ENV=production forever list"
}

ghost_restart() {
ghost_stop;
ghost_start;
}

run_rc_command "$1"
保存並退出。
下一步,給 ghost 服務腳本添加可執行許可權:
chmod +x ghost
為 ghost 日誌創建新的目錄和文件,並把屬主修改為 ghost 用戶:
mkdir -p /var/www/ghost/
touch /var/www/ghost/ghost.log
chown -R /var/www/ghost/
最後,如果你想運行 ghost 服務,你需要用 sysrc 命令添加 ghost 服務到開機啟動應用程序:
sysrc ghost_enable=yes
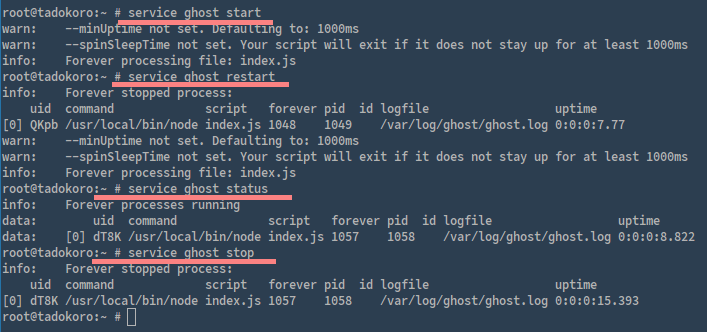
用以下命令啟動 ghost:
service ghost start
其它命令:
service ghost stop
service ghost status
service ghost restart
第五步 - 為 Ghost 安裝和配置 Nginx
默認情況下,ghost 會以獨立模式運行,你可以不用 Nginx、apache 或 IIS web 伺服器直接運行它。但在這篇指南中我們會安裝和配置 nginx 和 ghost 一起使用。
用 pkg 命令從 freebsd 庫中安裝 nginx:
pkg install nginx
下一步,進入 nginx 配置目錄並為 virtualhost 配置創建新的目錄。
cd /usr/local/etc/nginx/
mkdir virtualhost/
進入 virtualhost 目錄,用 nano 編輯器創建名為 ghost.conf 的新文件:
cd virtualhost/
nano -c ghost.conf
粘貼下面的 virtualhost 配置:
server {
listen 80;

#Your Domain
server_name ghost.me;

location ~* .(?:ico|css|js|gif|jpe?g|png|ttf|woff)$ {
access_log off;
expires 30d;
add_header Pragma public;
add_header Cache-Control "public, mustrevalidate, proxy-revalidate";
proxy_pass http://127.0.0.1:2368;
}

location / {
add_header X-XSS-Protection "1; mode=block";
add_header Cache-Control "public, max-age=0";
add_header Content-Security-Policy "script-src 'self' ; font-src 'self' ; connect-src 'self' ; block-all-mixed-content; reflected-xss block; referrer no-referrer";
add_header X-Content-Type-Options nosniff;
add_header X-Frame-Options DENY;
proxy_set_header X-Forwarded-For $proxy_add_x_forwarded_for;
proxy_set_header Host $http_host;
proxy_set_header X-Forwarded-Proto $scheme;
proxy_pass http://127.0.0.1:2368;
}

location = /robots.txt { access_log off; log_not_found off; }
location = /favicon.ico { access_log off; log_not_found off; }

location ~ /.ht {
deny all;
}

}
保存並退出。
要啟用 virtualhost 配置,你需要把那個文件添加到 nginx.conf。進入 nginx 配置目錄並編輯 nginx.conf 文件:
cd /usr/local/etc/nginx/
nano -c nginx.conf
在最後一行的前面,包含 virtualhost 配置目錄:
[......]

include virtualhost/*.conf;

}
保存並退出。
用命令 "nginx -t" 測試 nginx 配置,如果沒有錯誤,用 sysrc 添加 nginx 到開機啟動:
sysrc nginx_enable=yes
並啟動 nginx:
service nginx start
現在測試所有 nginx 和 virtualhost 配置。請打開你的瀏覽器並輸入: ghost.me
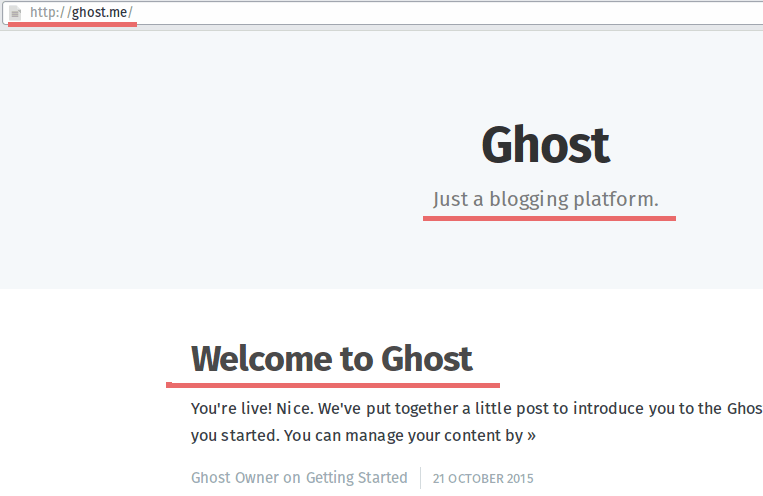
Ghost.me 正在成功運行。
如果你想要檢查 nginx 伺服器,可以使用 "curl" 命令。
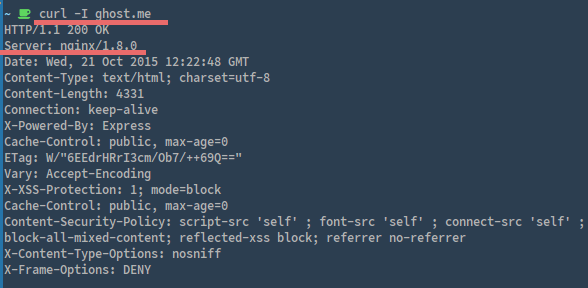
Ghost 正在 nginx 上運行。
總結
Node.js 是 Ryan Dahl 為創建和開發可擴展伺服器端應用程序創建的運行時環境。Ghost 是使用 node.js 編寫的開源博客平台,它有漂亮的外觀設計並且易於使用。默認情況下,ghost 是可以單獨運行的 web 應用程序,並不需要類似 apache、nginx 或 IIS 之類的 web 伺服器,但我們也可以和 web 伺服器集成(在這篇指南中使用 Nginx)。Sqlite 是 ghost 默認使用的資料庫,它還支持 msql/mariadb 和 postgresql。Ghost 能快速部署並且易於使用和配置。
via: http://linoxide.com/linux-how-to/install-ghost-nginx-freebsd-10-2/
本文轉載來自 Linux 中國: https://github.com/Linux-CN/archive
對這篇文章感覺如何?
You may also like


More in:Linux中國

捐贈 Let's Encrypt,共建安全的互聯網
Let's Encrypt 正式發布,已經保護 380 萬個域名

關於Linux防火牆iptables的面試問答
Lets Encrypt 已被所有主流瀏覽器所信任