HTTPS 简介及使用官方工具 Certbot 配置 Let’s Encrypt SSL 安全证书详细教程
本文内容较长,因为涵盖背景知识、基本概念和完整的实操过程,如果一步步照着做的话,应该就可以一次配置成功。不想要了解背景知识的同学可以直接跳到实操过程,六步即可使用 Let's Encrypt 官方工具 Certbot 配置 SSL 安全证书。
♦背景知识
已经了解过的同学或计算机相关专业的同学直接略过,跳到第三节。
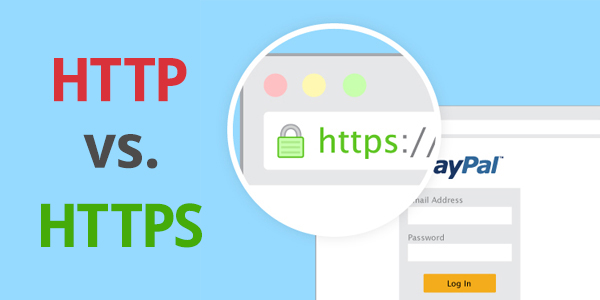
1、http 和 https 是什么?
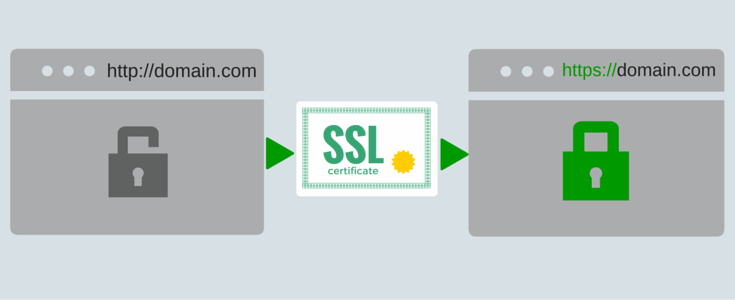
简单来说,http 是一个传输网页内容的协议,比如你看到的 http 开头的网站 http://www.163.com,其网页上的文字、图片、 CSS 、 JS 等文件都是通过 http 协议传输到我们的浏览器,然后被我们看到。

而 https 可以理解为“ HTTP over SSL/TLS ”,好端端的 http 为什么需要“ over SSL/TLS ”呢,因为 http 是明文传输的,通过 http 协议传输的内容很容易被偷看和篡改,为了安全(你肯定不想被人偷看或者篡改网页内容吧,比如网站银行密码什么的。)就为 http 协议再加上了一层 SSL/TLS 安全协议,所以就有了 https 。
2、SSL/TLS 是什么?
“ HTTP over SSL/TLS ”字面意思就是带“安全套接层”的 http 协议,内心纯洁的同学也可以理解为“带安全套的 http ”,因为带了安全套,所以当然会比较安全(/(ㄒoㄒ)/~~)。其中 SSL 是“ Secure Sockets Layer ” 的缩写,是“安全套接层”的意思。 TLS 是 "Transport Layer Security" 的缩写,是 " 传输层安全协议 " 的意思。 SSL 和 TLS 是同一个东西的不同阶段,理解为同一个东西也行,都是安全协议就对了。
3、为什么要部署 https?
说到底,就是 https 更安全。甚至为了安全,一个专业可靠的网站, https 是必须的。 Firefox 和 Chrome 都计划将没有配置 SSL 加密的 http 网站标记为不安全(貌似 Firefox 50 已经这么干了),目前它们也正在联合其他相关的基金会与公司推动整个互联网 https 化,现在大家访问的一些主要的网站。如 Google 多年前就已经全部启用 https ,国内的淘宝、搜狗、知乎、百度等等也全面 https 了。甚至 Google 的搜索结果也正在给予 https 的网站更高的排名和优先收录权。
4、怎么部署 https 呢?
你只需要有一张被信任的 CA ( Certificate Authority )也就是证书授权中心颁发的 SSL 安全证书,并且将它部署到你的网站服务器上。一旦部署成功后,当用户访问你的网站时,浏览器会在显示的网址前加一把小绿锁,表明这个网站是安全的,当然同时你也会看到网址前的前缀变成了 https ,不再是 http 了。
5、怎么获得 SSL 安全证书呢?
理论上,我们自己也可以签发 SSL 安全证书,但是我们自己签发的安全证书不会被主流的浏览器信任,所以我们需要被信任的证书授权中心( CA )签发的安全证书。而一般的 SSL 安全证书签发服务都比较贵,比如 Godaddy 、 GlobalSign 等机构签发的证书一般都需要20美金一年甚至更贵,不过为了加快推广 https 的普及, EEF 电子前哨基金会、 Mozilla 基金会和美国密歇根大学成立了一个公益组织叫 ISRG ( Internet Security Research Group ),这个组织从 2015 年开始推出了 Let's Encrypt 免费证书。这个免费证书不仅免费,而且还相当好用,所以我们就可以利用 Let's Encrypt 提供的免费证书部署 https 了。那么怎么获得 Let's Encrypt 安全证书,并且将它部署在自己的网站服务器上呢?这就是这篇文章要讲的内容了。
注:对 https 、数字证书及 CA 的工作原理感兴趣的同学可以阅读编程随想的系列文章。
♦ Let's Encrypt 及 Certbot 简介
前面已经介绍过, Let's Encrypt 是 一个叫 ISRG ( Internet Security Research Group ,互联网安全研究小组)的组织推出的免费安全证书计划。参与这个计划的组织和公司可以说是互联网顶顶重要的先驱,除了前文提到的三个牛气哄哄的发起单位外,后来又有思科(全球网络设备制造商执牛耳者)、 Akamai 加入,甚至连 Linux 基金会也加入了合作,这些大牌组织的加入保证了这个项目的可信度和可持续性。
尽管项目本身以及有该项目签发的证书很可信,但一开始 Let's Encrypt 的安全证书配置起来比较麻烦,需要手动获取及部署。存在一定的门槛,没有一些技术底子可能比较难搞定。然后有一些网友就自己做了一些脚本来优化和简化部署过程。其中有一个网友 xdtianyu 做了一个可以快速获取及更新证书的 letsencrypt.sh 脚本被广泛使用,地址如下:
https://raw.githubusercontent.com/xdtianyu/scripts/master/lets-encrypt/letsencrypt.sh
首先要感谢 xdtianyu 同学的努力付出。我之前用的也是这个脚本,不知道是不是姿势不对,虽然顺利地按照流程装上了,但用 SSLlabs 检测我配的网站还是不太安全,在很多浏览器上都被标注为“不安全”。当时因为忙也没有太多时间折腾和细究,不过后来 ISRG 的发起者 EFF (电子前哨基金会)为 Let's Encrypt 项目发布了一个官方的客户端 Certbot ,利用它可以完全自动化的获取、部署和更新安全证书。这真是非常容易、方便呀,所以我们就可以直接使用官方客户端,不需要再使用第三方的工具了。虽然第三方工具也可以使用,但是官方工具更权威,风险也更小,而且遇到问题也更容易解决,毕竟有官方的支持。何况 Certbot 确实非常方便,也比所有的第三方工具都更方便,何乐而不用呢?
♦官方客户端 Certbot 使用方法
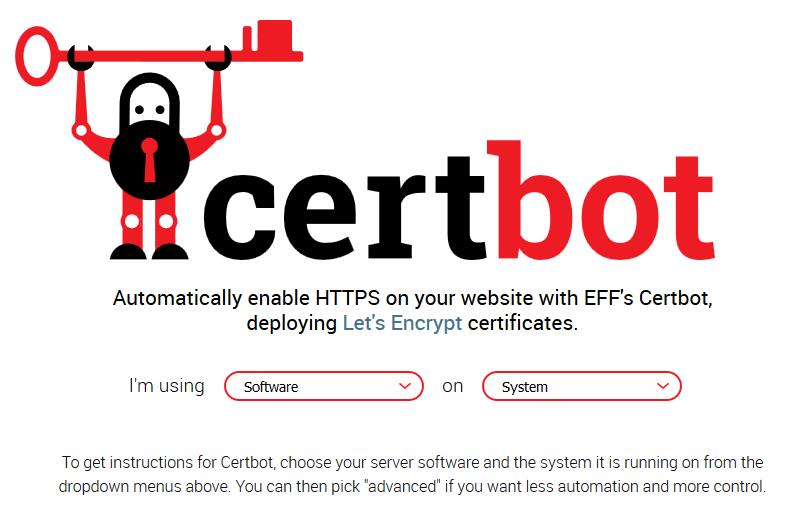
Certbot 的官方网站是 https://certbot.eff.org/ ,打开这个链接选择自己使用的 web server 和操作系统,EFF 官方会给出详细的使用方法,如下图,不过我觉得这样还是太复杂,太麻烦,所以建议读者朋友可以不用看这个网站,按照我的方法走一遍即可。我自己的个人网站( https://wenqixiang.com )和本站( https://linuxstory.org )都是按此方法配置,以下以本网站域名( linuxstory.org )举例。
假定运行环境:Debian 8.0 64 位(本教程同样适用于 Debian 、 Ubuntu 、 CentOS 、 Arch Linux 、), Web 服务器是 Nginx 1.10 ,当前工作目录为 /home/linuxstory 家目录。如果是从零开始配置服务器,推荐使用 Debian 8 + lnmp 作为网站环境。
1、获取 Certbot 客户端
wget https://dl.eff.org/certbot-auto
chmod a+x ./certbot-auto
./certbot-auto --help
2、配置 nginx 、验证域名所有权
在虚拟主机配置文件( /usr/local/nginx/conf/vhost/linuxstory.org.conf )中添加如下内容,这一步是为了通过 Let's Encrypt 的验证,验证 linuxstory.org 这个域名是属于我的管理之下。(具体解释可见下一章“一些补充说明”的“ certbot 的两种工作方式”)
location ^~ /.well-known/acme-challenge/ {
   default_type "text/plain";
   root     /home/wwwroot/linuxstory.org/;
}

location = /.well-known/acme-challenge/ {
   return 404;
}
3、重载 nginx
配置好 Nginx 配置文件,重载使修改生效(如果是其他系统 nginx 重载方法可能不同)
sudo nginx -s reload
4、生成证书
./certbot-auto certonly --webroot -w /home/wwwroot/linuxstory.org -d linuxstory.org
中间会有一些自动运行及安装的软件,不用管,让其自动运行就好,有一步要求输入邮箱地址的提示,照着输入自己的邮箱即可,顺利完成的话,屏幕上会有提示信息。
此处有坑!如果顺利执行请直接跳到第五步,我在自己的服务器上执行多次都提示
connection :: The server could not connect to the client for DV :: DNS query timed out
发现问题出在 DNS 服务器上,我用的是 DNSpod ,无法通过验证,最后是将域名的 DNS 服务器临时换成 Godaddy 的才解决问题,通过验证,然后再换回原来的 DNSpod 。
证书生成成功后,会有 Congratulations 的提示,并告诉我们证书放在 /etc/letsencrypt/live 这个位置
IMPORTANT NOTES:
 - Congratulations! Your certificate and chain have been saved at
   /etc/letsencrypt/live/linuxstory.org/fullchain.pem. Your cert
   will expire on 2017-02-011. To obtain a new version of the
   certificate in the future, simply run Let's Encrypt again.
5、配置 Nginx(修改 /usr/local/nginx/conf/vhost/linuxstory.org.conf),使用 SSL 证书
listen 443 ssl;
server_name linuxstory.org www.linuxstory.org;
index index.html index.htm index.php;
root  /home/wwwroot/linuxstory.org;

ssl_certificate      /etc/letsencrypt/live/linuxstory.org/fullchain.pem;
ssl_certificate_key  /etc/letsencrypt/live/linuxstory.org/privkey.pem;
上面那一段是配置了 https 的访问,我们再添加一段 http 的自动访问跳转,将所有通过 http://www.linuxstory.org 的访问请求自动重定向到 https://linuxstory.org
server {
    listen 80;
    server_name linuxstory.org www.linuxstory.org;
    return 301 https://$server_name$request_uri;
}
6、重载 nginx,大功告成,此时打开网站就可以显示绿色小锁了
sudo nginx -s reload
♦后续工作
出于安全策略, Let's Encrypt 签发的证书有效期只有 90 天,所以需要每隔三个月就要更新一次安全证书,虽然有点麻烦,但是为了网络安全,这是值得的也是应该的。好在 Certbot 也提供了很方便的更新方法。
1、测试一下更新,这一步没有在真的更新,只是在调用 Certbot 进行测试
./certbot-auto renew --dry-run
如果出现类似的结果,就说明测试成功了(总之有 Congratulations 的字眼)
Congratulations, all renewals succeeded. The following certs have been renewed:
   /etc/letsencrypt/live/linuxstory.org/fullchain.pem (success)
** DRY RUN: simulating 'certbot renew' close to cert expiry
** (The test certificates above have not been saved.)
2、手动更新的方法
./certbot-auto renew -v
3、自动更新的方法
./certbot-auto renew --quiet --no-self-upgrade
♦一些补充说明解释
1、certbot-auto 和 certbot
certbot-auto 和 certbot 本质上是完全一样的;不同之处在于运行 certbot-auto 会自动安装它自己所需要的一些依赖,并且自动更新客户端工具。因此在你使用 certbot-auto 情况下,只需运行在当前目录执行即可
./certbot-auto
2、certbot的两种工作方式
certbot (实际上是 certbot-auto ) 有两种方式生成证书:
- standalone 方式: certbot 会自己运行一个 web server 来进行验证。如果我们自己的服务器上已经有 web server 正在运行 (比如 Nginx 或 Apache ),用 standalone 方式的话需要先关掉它,以免冲突。
- webroot 方式: certbot 会利用既有的 web server,在其 web root目录下创建隐藏文件, Let's Encrypt 服务端会通过域名来访问这些隐藏文件,以确认你的确拥有对应域名的控制权。
本文用的是 webroot 方式,也只推荐 webroot 方式,这也是前文第二步验证域名所有权在 nginx 虚拟主机配置文件中添加 location 段落内容的原因。
呜呼,安得 SSL 安全证书千万张,大庇天下网站安全俱欢颜!希望互联网早日进入 https 普及化。
本文链接: https://linuxstory.org/deploy-lets-encrypt-ssl-certificate-with-certbot
LinuxStory 原创教程,转载请注明出处,否则必究相关责任。
对这篇文章感觉如何?
You may also like

11 Comments
Leave a reply
More in:教程
如何在Debian稳定版安装最新的 Firefox 浏览器

在 Ubuntu 像22.04 LTS Linux 安装 JUnit 5

同时运行多个 Linux 命令
在 Ubuntu 22.04 或 20.04 上为 LaTeX 文档安装 pgfplots


作为一名负责的游客,必须写下到此一游
这篇文章有点误人子弟,环境不同跟着你会走很大的弯路,浪费很多时间。
事实上,跟着官网,选择好自己的环境,按提示去做非常容易,几分钟就搞定了。
大佬,你的域名已经标注为不安全拉~~~~
大佬,怎么样才能创建www.xxx.com这样的证书呢,现在只能创建xxx.com这样的
另外,证书怎么样才能删除二次重新创建呢
博主,我用的是lnmp1.4版本,不会自动更新证书,能帮我看看原因吗?
博主,打扰下,我按您的方式配置完毕,目前网站首页已可用 HTTPS 访问并且显示安全,但同时产生了另外几个问题。
重启 nginx 时提示 “conflicting server name “site.com” on 0.0.0.0:80, ignored”
原 HTTP 链接未自动跳转到 HTPS
网站内页使用 HTTPS 访问时返回 404
系统是 CentOS 6,Nginx 配置文件在此 https://1drv.ms/t/s!AtnAYMg0k1P1gox2NsLlHHvlI904ew ,能否帮忙看下
你好 博主 我也是按照您的方法申请好了证书 但是提示证书无效 错误代码: SSL_ERROR_BAD_CERT_DOMAIN
你好博主,我按照你的教程部署了,但是浏览器提示不安全,服务器的证书和域名信息不相符
步骤清晰准确,我按照你提供的步骤已经成功部署ssl证书了。 唯一不足的就是90天后要手动更新一次证书,但为了安全,忍了~
你好版主,这段时间我一直为部署ssl而烦恼,我的服务器环境是ubuntu16.0.4 + lamp环境,试了很多次,在网上找了很多文章都不能正确安装配置letsencrypt,希望能等到版主的帮助,我的电子邮箱:zxmatline@163.com.,非常感谢
你好,请问你遇到的问题是什么?可否描绘一下?